
Adobe Audition Beginner Guide
Form a band online, promote your music, buy custom beats, sound parts, and share your Beat or Track as a Royalty Free loop with us. Collaborate to make beats online with the best loop makers from around the world on the Forum for musicians and beat makers. Keep up to date with Music News and learn from FL Studio Video Tutorials and the articles on the Blog. Free DAW Music Software downloads, VST and Instrument Packs for FL Studio, Pro Tools, Logic, Ableton, and how to use the most popular free DAW Software, Fruity Loop Plugins, MIDIs and more.
Since Adobe’s acquisition in the early 2000s, Audition (formerly Cool Edit Pro) has been the undisputed industry standard for audio editing, mixing and processing. Ambitious young software developers David Johnston and Robert Ellison left their lucrative career at Microsoft behind and founded Syntrillium Software in the ‘90s. Their flagship software product was the Cool Edit (which subsequently became the Cool Edit Pro). The audio editing application developed for the Windows operating system was equipped with only basic functionalities and could not handle multiple tracks. However, Syntrillium was quick to launch subsequent versions with multiple-track support, noise reduction etc.
Cool Edit Pro also allowed import and export of codecs for almost every popular audio format then, including MP3, MPEG-1 Audio, AAC, AIFF, FLAC, Ogg, Dolby AC3 and WMA. Adobe’s purchase of Cool Edit Pro for a whopping $16.5 million became a major turning point. The application has since been so ubiquitous among audio engineers at all levels. Every audio engineer would have used or at least tried the Adobe Audition at some point in his/her career. Arguably among the most comprehensive audio editing applications today, Audition facilitates seamless handling, editing and processing of multi-track audio across various formats. You don’t need to equip yourself with expensive heavily configured hardware to smoothly run Audition as Adobe only recommends a bare minimum of 4 GB RAM and 4 GB hard-disk space.
Your home PC or laptop with this recommended configuration or above would suffice to get you started with Adobe Audition. Adobe has not released a Linux-supporting variant yet. The application is currently available for Windows and Mac operating systems. The generally non-destructive edit and mix application also features a waveform view for editing which is destructive, making the changes you make there permanent, just like how it was when working with analog tapes. The Audition interface is fairly user-friendly. However if you have no previous editing experience, it could take a few sessions for you to get comfortable with it. Nevertheless, the application lends you stability and versatility second to none, that you would never contemplate trying out alternatives once you get used to its interface.
Read: A Brief Introduction to DAWs
Let us get started with the interface:
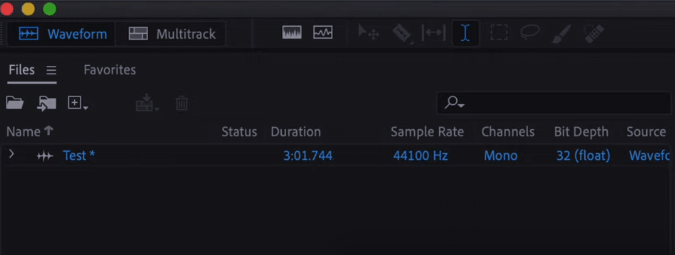
On the left hand side of your interface, you will find the FILES panel which lists all the audio files that are open in your Audition session. We are in the WaveForm view.
Below the FILES panel, is your Media Browser that lets you traverse through the various folders and files in your system, simultaneously allowing you to audition the audio files by clicking on them. 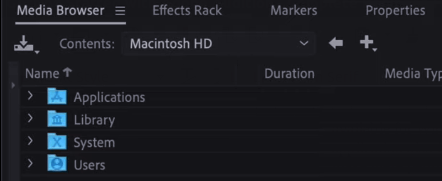
Beside the media browser is the Effects Rack that contains several built-in presets (audio FX) that could be added to your audio.
Even if you record a a fairly noiseless input that sounds good, you may want to add some basic effects to it, like REVERB, EQ etc. Say for instance you want to add REVERB to your input. Go to the Effects Rack, click on the arrow mark on your track and select REVERB and choose the type of reverb you want in your input. 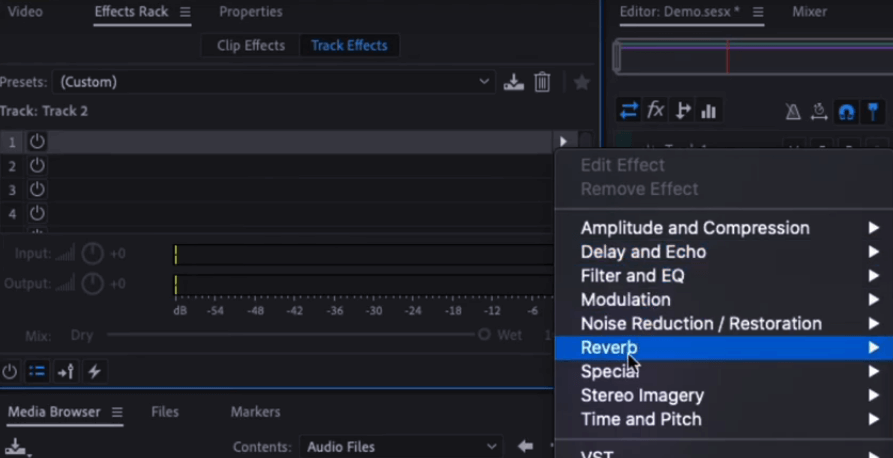
The various types of reverbs available on Audition are Convulation Reverb, Studio Reverb, Full Reverb, Surround Reverb etc. After selecting the appropriate reverb effect for your track, you may adjust the reverb levels on the next window and click on APPLY.
Even if you record a flawless audio input, the additional audio files you may import to edit may not necessarily be as noiseless and clean. It is thus necessary to remove the background noise in such audio files, and this can easily be done on Adobe Audition. There are multiple ways to remove noise. However the DeNoise plugin can remove a significant amount of background noise in most audio files. Go to the EFFECTS menu and select Noise Reduction/Restoration and click on DeNoise from the sub-menu. The following window appears, where you can manually adjust the noise levels. 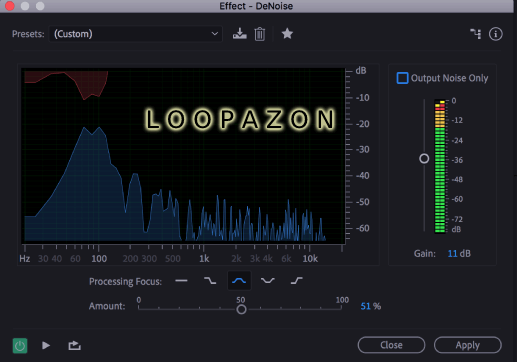
Below the Media Browser and Effects Rack panel, you’ll find HISTORY where you can track all the actions that have been performed to your audio. Beside HISTORY, you will find the VIDEO tab that allows you to work with the videos you have imported to your Audition session. Make sure that your AUTOPLAY button is enabled, so that you can listen to the audio files before using them in your Audition session. 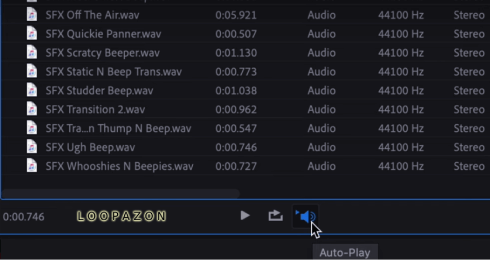
Drag and Drop the audio file you want, to your Audition workspace.
The very first thing to do once you open the Audition interface is to configure your audio interface for recording (input) and playback (output).
Go to the Adobe Audition menu (On Mac) or the Edit menu (On Windows) and select PREFERENCES. On the PREFERENCES window, select Audio Hardware. Select your INPUT and OUTPUT devices here. 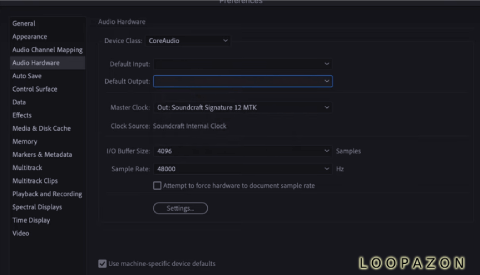
Also click on Audio Recording on the PREFERENCES window to confirm whether your left and right channels on the stereo input have the same input device selected. Do check the same for your stereo output.
Once this is done, you are ready to record audio on Adobe Audition. You’ll find the RECORD button at the bottom of the interface. 
Click on it when you are ready to record (Alternately you may press the SHIFT key and spacebar on your keyboard simultaneously to enable RECORDING).
Once you hit the RECORD button, Audition will prompt you with the New Audio File window where you name your audio file, select your sample rate. Generally the sample rate of an audio input is set to 44100. The bit-depth which would by default be 32-float on Audition is recommended to be kept so. Click OK once this is done and straightaway any audio input from the selected input device will be recorded onto your Audition session. If you want to make any adjustment to your input volume, do it on your external audio interface. Make sure your volume is not too high. Volume levels beyond the -6dB limit would produce distortion. Hit the spacebar on your keyboard, or click on the STOP button to stop your current recording.
Read: Getting Started with GarageBand
We have so far been working on the WaveFrom view, which is the default view on Adobe Audition. Audition offers an alternate view for editing which could possibly end up being the preference for at least some of you, mainly because of its non-destructive nature which allows you to undo and rollback the editorial changes you have made to your audio. Those of you who have worked with other audio editing applications may feel at home, in the multi-track view. The multi-track view facilitates a much faster workflow while editing and mixing different audio tracks, especially music.
To create your new multitrack session, go to the top-left area of the Audition interface and click MULTITRACK (beside WaveForm). Audition prompts you with a window called New Multitrack Session.
Name your file there and set your sample rate to 44100 and select stereo multitrack if you would have music in your session. Click OK and you are presented with the multitrack view: 
Here you can drag and drop audio files from the Media Browser. The non-destructive mode allows you to work with multiple tracks while constantly making changes to them. You may have an audio input on one track, music on another. If you want to add Effects, you may select the respective track on the Effects Menu and follow the same steps mentioned earlier (while discussing the WaveForm view). The track controls are as usual, on the left-hand side of each track. You can manually adjust the volume levels of each track by dragging your cursor over the lines on the track. Once you are done with your work on the multi-track session, you may mix-down the session to a new file. To do this, click on the Multi-track Menu and select Mix-down session to New file and select Entire Session from the sub-menu. 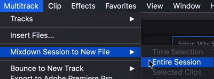
You can EXPORT the audio just like you save any other file your Windows application. Go to File, Click Save As, and then name your file , choose your destination folder and Click OK. 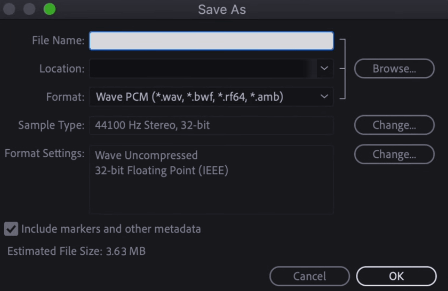
That would suffice for a fair level of basic knowledge to get started with Adobe Audition. Start exploring!