
Getting started with Acid Pro
Form a band online, promote your music, buy custom beats, sound parts, and share your Beat or Track as a Royalty Free loop with us. Collaborate to make beats online with the best loop makers from around the world on the Forum for musicians and beat makers. Keep up to date with Music News and learn from FL Studio Video Tutorials and the articles on the Blog. Free DAW Music Software downloads, VST and Instrument Packs for FL Studio, Pro Tools, Logic, Ableton, and how to use the most popular free DAW Software, Fruity Loop Plugins, MIDIs and more.
We did take a tour of the latest version of Sound Forge Audio Studio from Magix. Acid Pro is a highly efficient, user-friendly and relatively inexpensive DAW from the same stable. In fact Acid has been a Sound Forge sibling since their Sonic Foundry days. The DAW pretty much shared its fate with Sound Forge, initially struggling, subsequently flourishing and then languishing under multiple ownerships.
The initial versions of Sound Forge written solely by Monty Schmidt were considered a major breakthrough among software developers and soon attracted investment from Microsoft techie Curtis J Palmer. After Palmer’s purchase of 50% stake in Sonic Foundry, the freshly incorporated startup commenced the development Acid Pro, one of the earliest mainstream Digital Audio Workstations. Unlike Sound Forge, the first version of Acid Pro had five developers working on it, including Schmidt at the helm. The first official release happened in 1998, when Cubase was on its rise. The unique selling point of Acid Pro was its loop-based music-sequencer that enabled quick dragging and dropping of Acid loops to any song. An Acid loop could adjust itself to the tempo of the song and surprisingly there was hardly any perceptible sonic degradation.
Acid Pro is one of the best DAWs for beginners to start their journey in music production. While similar DAWs come at twice its cost, the Acid Pro 10 would just cost you almost the same as Logic Pro X. While Apple has held the reputation of selling Logic PRO, one of the world’s best DAWs at almost a third the price of its biggest competitor Cubase, the application has remained a privilege of Apple users. Most of the student level music producers find the Apple hardware prohibitively expensive. The best option for them is to go for a reasonably configured Windows PC and get an affordable DAW like REAPER or Acid PRO. While REAPER’s non-commercial license is available at an unbelievably low-price, you may have to shell out extra bucks to acquire a good collection of VSTs, loops and samples.
This leaves you with Acid Pro as the best Windows alternative of Logic PRO X. A cheaper version called the Acid Music Studio is also available though Loopazon strongly recommends the fully-loaded Acid Pro. Even the earliest versions of ACID were incredibly user-friendly allowing its users to easily and quickly do loop-based and sample-based music production. However, like Sound Forge, Acid Pro entered a period of stagnation in the late 2000s, precisely less than five years after the acquisition by Sony. Sony offered its final update of Acid Pro in 2008 and the DAW wouldn’t see another update for the next ten years. In the mid-2010s, Sony sold off its Sony Creative Software assets including Sound Forge and Acid PRO to famed German multimedia software company, Magix GmbH.
This raised hopes among Acid Pro fans about a probable revival of their favorite music production software, since Magix was the company that produced the Magix Music Maker, one of the earliest digital audio workstations (DAWs) in the early 90s. Multiple efforts were made by many such fans to reach out to Magix and persuade them to revive Acid Pro. Thankfully their efforts didn’t go in vain.
Magix brought Acid Pro back to the mainstream by releasing the Acid Pro 8 in spring 2018. The modern versions from Magix come with around 9 GB of built-in loops, an incredibly vast library considering the price of the application. Magix continues the tradition of Acid Pro, making it available exclusively for Windows users. You need a 64-bit Windows operating system to use it. Despite speculation among enthusiasts, there has been no official update regarding a possible Windows or Linux variant yet.
Read: A Glimpse Into REAPER for Beginners
Let us take an introductory tour of Acid Pro 10:
This above screenshot of the Acid Pro might seem very familiar if you have toyed with Sound Forge before. Even if you are totally new to audio or music production, you would have sighed in relief on your first glance at the interface. It doesn’t look intimidating for a newbie unlike some of its competitors. Twenty two years after its debut, the one thing that remains unchanged despite multiple ownerships, is its minimalistic interface. A rookie could be off to a flying start, confidently working on his first track in a matter of hours.
To open a new project, click on the green icon located under the menu bar. 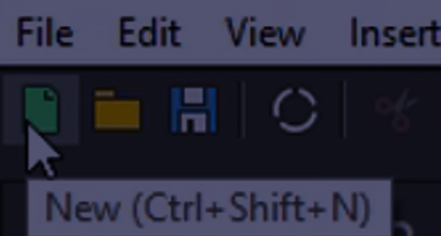
Alternately you can do this by the Conrol, Shift and N keys on your keyboard simultaneously. 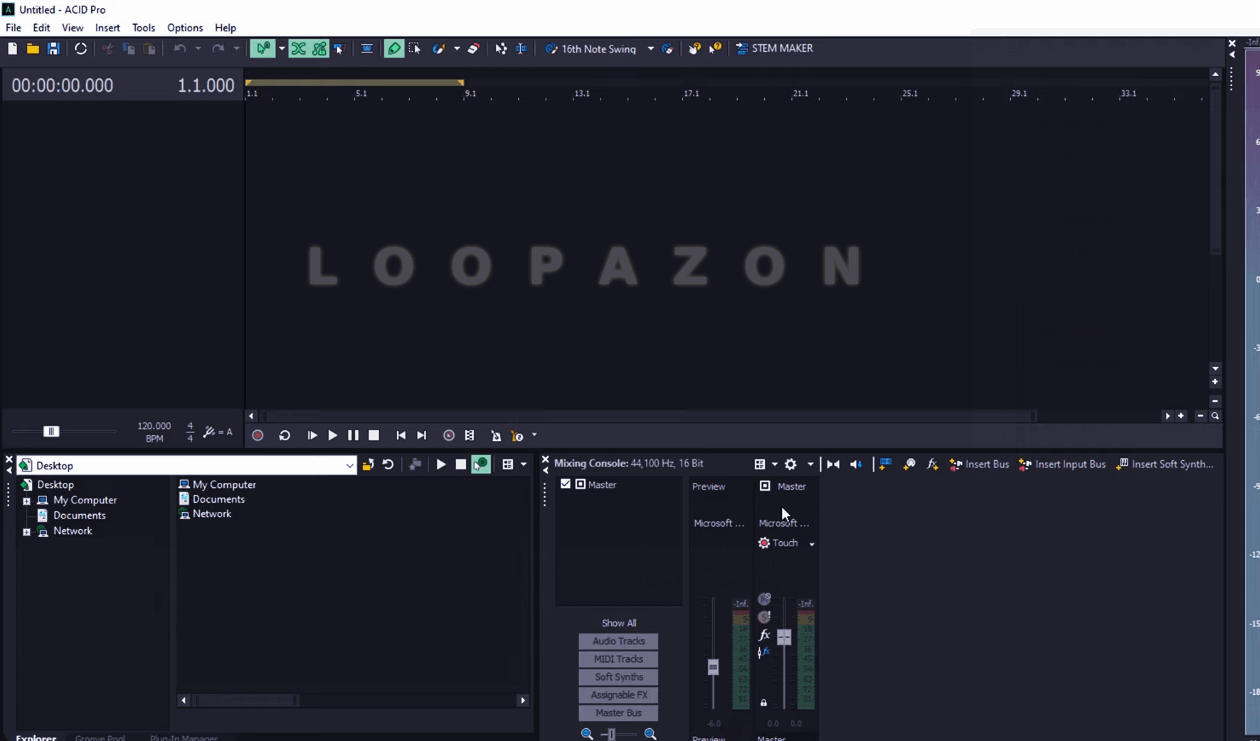
The bottom-left portion of the interface has the file-browser that lets you traverse through the various files and folders in your system or externally connected drives, minimizing your Acid Pro session. You may simply drag and drop the desired audio file directly to the timeline. Acid Pro would automatically create an Audio track. 
Just like its Apple counterparts Logic Pro and GarageBand, Acid Pro has two types of tracks; viz. Audio track and MIDI track. An audio track is any file in traditional audio formats like MP3, WAV etc. This could be your loops, samples or excerpts from other tracks that you want to edit or use in your ACD project.
A MIDI track is for your software instrument and synth inputs. Like Logic Pro, GarageBand and other mainstream DAWs, Acid Pro doesn’t allow you to have Audio and MIDI information on the same track. Your track controls are on the left-side of each track. The scale above displays the timecodes of your track. You can move your playhead easily to your decide time-position to edit or playback from that position. The track controls display the timecodes in their usual format and in BARS. 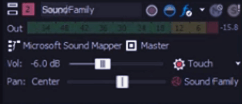
Besides this, the track controls allow you to adjust the volume of each individual track. Below the volume control, you have the pan control where you can adjust the stereo output level of each track by dragging the slider towards the left and right, and positioning it appropriately based on your output requirement.
The PLAY, PAUSE and STOP buttons are located on the bottom of the timeline.
![]()
These controls are self-explanatory. However, you can use your mouse to click and drag to make a selection for playback.
Read: Getting Started with GarageBand
On the left-hand side of the PLAY, PAUSE and STOP controls are the Tempo and Time Signatures. Even if you already have multiple tracks in your timeline, you may adjust the tempo of your track by using this slider:![]()
The S button on located on the extreme-right of your track controls is the SOLO button, which allows you to playback the particular track, automatically muting every other track in the session. The M button towards its left does the exact opposite. It mutes the particular track during playback. The changes would be reflected on the Mixing Console on the bottom right part of the interface. You can make the changes directly on the Mixing Console too. Here you also have the Master Track holding combined information of every audio track in the timeline.
The DRAW tool can be used to select, edit and move portions on your track. 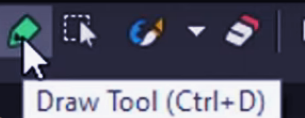
Just as with Sound Forge, you may split a single track in two or three regions to facilitate smoother and more intricate editing. To do this, position your playhead on the desired point of separation and simply hit the S key on your computer keyboard.
To expand or shorten a region or a track, place your cursor on the opening or closing edge of the region and perform a simple click and drag operation.
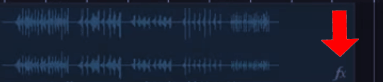
Just as with we did in Sound Forge, you may want to add EFFECTS to your track. Click on the FX symbol on your track.
From the list of effects, choose your desired EFFECT and click on ADD. 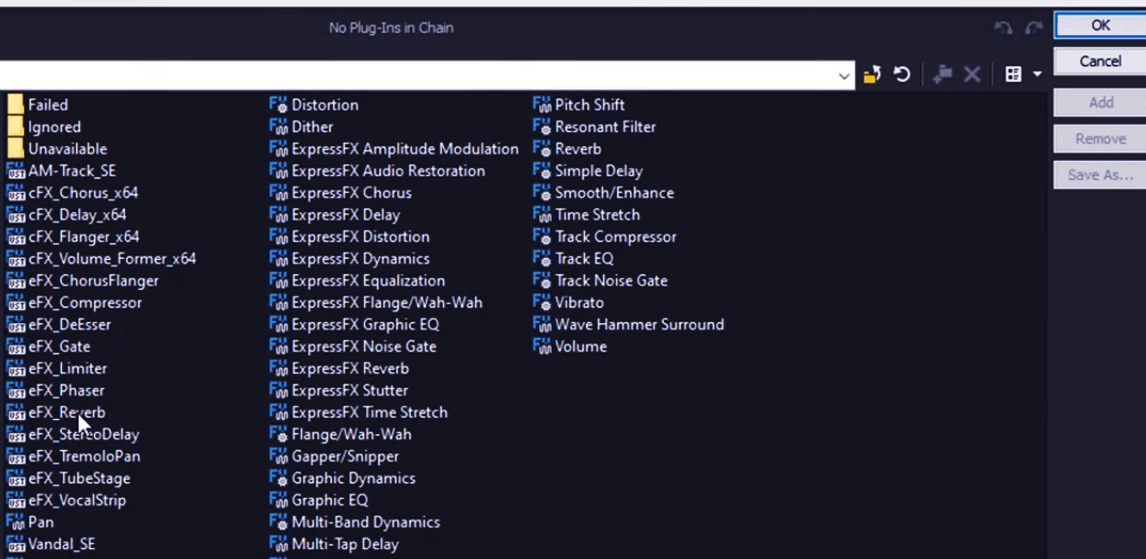
You can ADD multiple effects to the same track. However let us just add REVERB here. Click OK to apply the effect(s) to your track. Each effect is a plugin that allows you to make adjustments based on your requirement.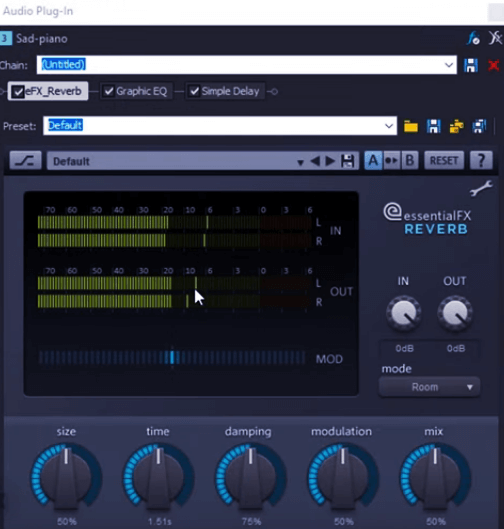
You can also add a common effect to the all the audio tracks in the project by applying an effect to the Master track (on the mixing console).
Now you may not want to limit yourself to working with audio tracks. You would straightaway want to start producing music with MIDI tracks. As mentioned above, MIDI and Audio information cannot co-exist on a single track. Thus you need to insert a new MIDI track. Right-click on your timeline and select Insert MIDI track. 
Use the DRAW tool to click and drag to create a MIDI clip on your timeline.
Right-click on the MIDI clip to go to CLIP properties to open your piano-roll. Alternately, you can just press G on your computer keyboard, which would directly create a piano roll on your timeline where you can use the draw tool to click and drag, creating your own sequence of notes.
The default instrument in a Piano roll is the Piano itself from the DLS Soft Synthesizer. However, with MIDI tracks you would want to work with multiple instruments.
Go to the track controls and click here:

Select Insert Soft Synth. In the next window, select from among the soft synth packages, each containing a collection several soft synth instruments. 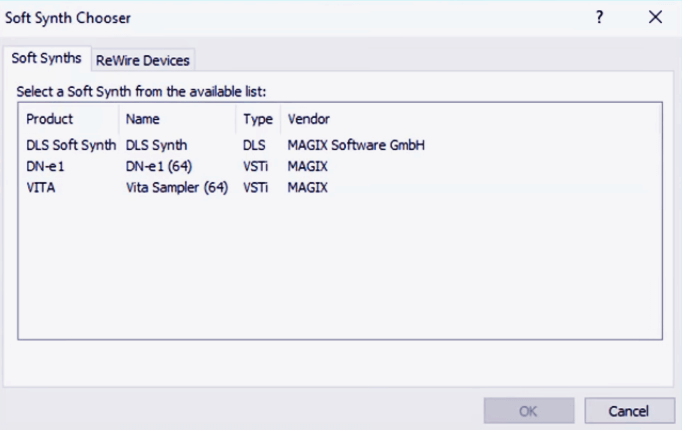
Open one of them and traverse through the instruments it contains. You may audition them before applying to your track by using on the piano-roll on the plugin. 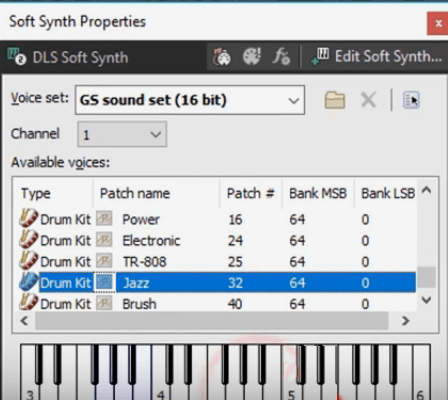
While the MIDI tracks too are listed in the Mixing Console like the audio tracks, each synthesizer exists as a Bus track.
To EXPORT your session as an Audio File, go to the File Menu and click on Render As. Choose the desired audio format and click on SAVE. You may want to come back and rework on the composition later. Thus, you need to save you Acid Pro session. Go back to the File menu and click on Save As. Your session will be saved as an Acid Pro project with a .acd extension.
Well, those are the fundamentals of Acid Pro. As you explore more, you would find a lot more features. Some of them are quite addictive making the Acid Pro a favorite among DJs and Remix producers.