
A Glimpse into REAPER for Beginners
Form a band online, promote your music, buy custom beats, sound parts, and share your Beat or Track as a Royalty Free loop with us. Collaborate to make beats online with the best loop makers from around the world on the Forum for musicians and beat makers. Keep up to date with Music News and learn from FL Studio Video Tutorials and the articles on the Blog. Free DAW Music Software downloads, VST and Instrument Packs for FL Studio, Pro Tools, Logic, Ableton, and how to use the most popular free DAW Software, Fruity Loop Plugins, MIDIs and more.
Ableton Live is one of the top-ranked digital audio workstations (DAWs) in the world, with a No.1 ranking in many listings. This mainly owes to its capability in fitting into both studio and live environments. The application has remained the most favored DAW among turntablists. It was one of the first mainstream DAWs that enabled automatic beatmatching of songs. Some of the best DJs in the world prefer the Ableton Live to other DAWs even today, with dozens of imitations out there. The Ableton Live is available for both Windows and Mac platforms. The internal processing is 32-bit though the Ableton applies a 64-bit summing to every single mix point.
Read: A Brief Introduction to DAWs
The Ableton Live Lite, is a free offering from Ableton as a gestating platform for fledgling music producers before making the full version, Ableton Live Standard their permanent tool. It is exactly what GarageBand is to the Logic Pro X. This free version often comes along with many hardware and software packages. Just like GarageBand, the Ableton Live Lite provides you with almost all the major virtual instruments, effects and workflows present in the Standard version of the application.
Read: Getting Started with GarageBand
It also allows you to import third-party plug-ins. You can start composing, recording and producing music straightaway with the Lite version, with its only notable limitation being an 8-track limit for MIDI and audio (combined).

The default view on the Ableton Live interface is the session view. This is what gives the Ableton an edge over many of its competitors. The session view is a boon for live performers and is very quick and easy compared to your traditional arrangement timeline. Let us quickly go through the interface.
The controls on the top-left hand side of the interface are for adjusting the tempo of your track.To adjust the BPM (Beats Per Minute)
![]()
Alternatively click and drag up or down to increase or decrease the BPM value. Again if BPM values confuse you as a beginner, you may just click on the TAP button continuously to the rhythm of your song.

Ableton gives you the BPM value based on your frequency of TAPS per minute.
Similarly, to make changes to the time-signature of your track, you may click and type in the desired value here.

This button with here with two small circles, is the Ableton metronome.

You may click it to enable the click tracks while recording or playing. As with other DAWs, we suggest you always have the metronome enabled so that you get to accurately follow your rhythm and nail your performance in fewer takes.
PLAY, STOP and RECORD

Additionally, it hosts all the third-party plug-ins you have downloaded, besides effects that can be applied to your tracks (like EQ, reverb etc.)
Let us explore Ableton’s unique session view. This is one of the characteristics that has drawn thousands of live performers to this DAW over the years. The Ableton Live has the session view as its default view. However if you are on the arrangement view, you can go to the extreme right corner of your interface and click on the three parallel vertical lines to switch to the session view.

This is how your interface would look in the session view: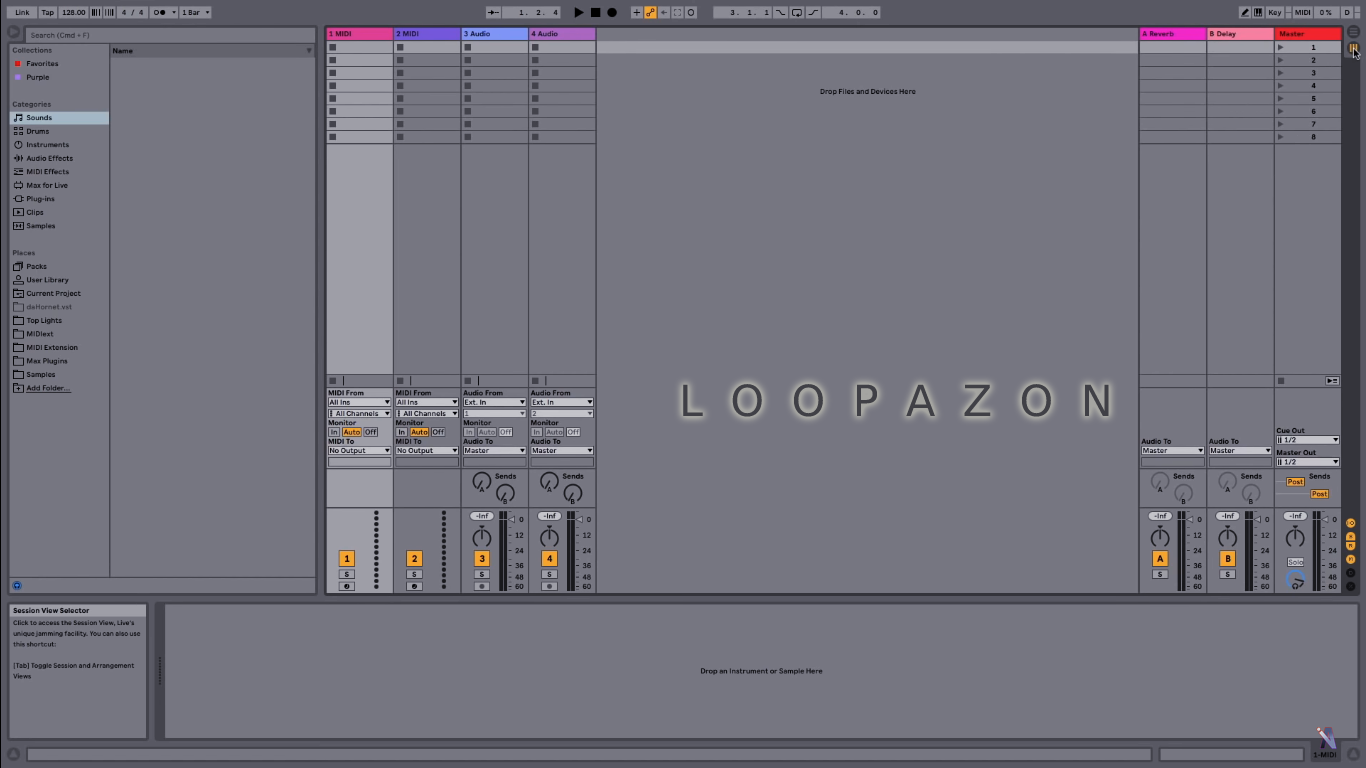
Please note that only the view is changing, while your session remains the same. You can work on a session with one view and press Tab to see how the same looks in the other view. A glimpse of the session view could be intimidating for those of you who have been working on other DAWs. Worry not! The session view is in fact much simpler and more fun, especially if you are jamming with fellow musicians.
In the above snapshot of the session view, there are four tracks by default, two MIDI tracks and two audio tracks, with the former enabling you to work with virtual instruments and the latter, with external audio input from microphones or guitars. You can work with several layers on a track and also add more tracks if you want. However the maximum number of tracks you can have (MIDI and Audio combined) is limited to 8 in this Lite edition of Ableton Live.
You can drag and drop samples and virtual instruments from the library to each individual track which hosts a number of layers in rectangular cells. Ableton calls each cell a scene. For the audio tracks, you can select from the sound effects in the library. Again, Ableton has limited the number of scenes to 8, in the Lite edition. The volume control for each track can be found on the bottom of the scenes as opposed to a traditional timeline view of DAWs where you would find the tracks arranged horizontally with controls on the left.
To load the Piano roll, double-click on one of the scenes (rectangular boxes) of a MIDI track.

Click on the pencil button on the top-right corner. Using this you may draw your notes on the piano roll.
If you have migrated from another DAW, you can switch to the arrangement view, giving you a traditional DAW workspace. For some of you beginners who haven't worked on other DAAWs, let us see how to record a track with the arrangement view. Knowing this is highly recommended as this is the traditional pattern across mainstream DAWS, to record and produce your tracks. To switch to the arrangement view, click on the three horizontal parallel lines on the right hand side of the interface (above the session view symbol). Those familiar with other DAWs may be quite relieved to see this traditional timeline view.
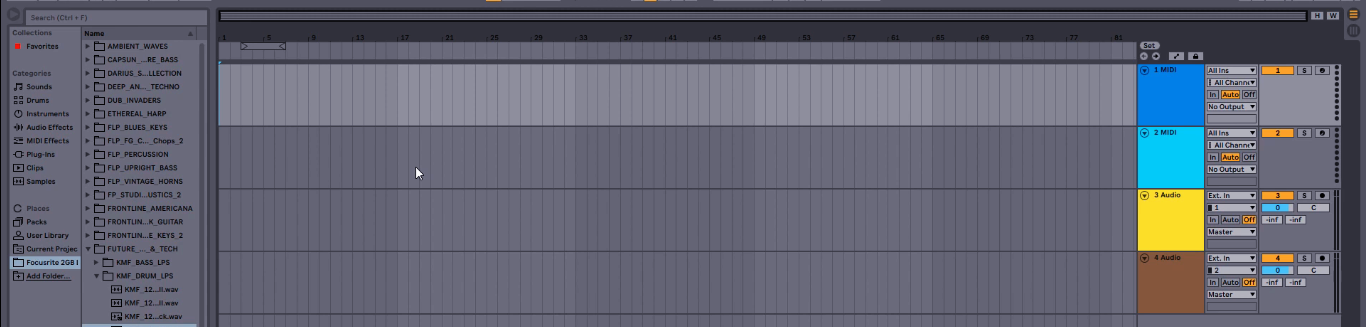
However, the track details are on the right as opposed to DAWs like Logic Pro X or GarageBand, though it doesn’t make a significant difference. If you want to add more tracks, you can go to the create menu and select the type of track you want to load (insert MIDI track or insert audio track). Remember that you can have only up to 8 tracks in this edition. Now before you record on a track in Ableton live, you should arm that particular track. To do this, click on the circular dot on the extreme right of the selected track. Suppose you want to record on the MIDI track.
- Select a virtual instrument of your choice from the library and drag it onto your track.
- Click on the metronome symbol to enable the click-track while recording.
- Setting the metronome to a 1-bar count-in is recommended.
- Click on the record symbol and the click-track plays for a bar before the recording starts. Provide your MIDI input which would be recorded on to your timeline.

- Disarm the track by clicking on the same dot that you had used for arming it.
Repeat the process for your audio track. The only difference is that you don’t have to go to the library to pick an instrument as you are providing external input, like a guitar.
![]()
However after recording, you can go to the library and browse through the audio effects to select your favorite amps for the guitar track. Drag it to the audio track.
To EXPORT the audio, go to the file menu and select Export Audio. In the next window, you may select your output audio format.
So, that was just a glimpse into the interface of the free version of Ableton Live 10, one of the world’s most favored DAWs. Get your copy and start exploring!