
Beginner’s glimpse into the Studio One interface
Form a band online, promote your music, buy custom beats, sound parts, and share your Beat or Track as a Royalty Free loop with us. Collaborate to make beats online with the best loop makers from around the world on the Forum for musicians and beat makers. Keep up to date with Music News and learn from FL Studio Video Tutorials and the articles on the Blog. Free DAW Music Software downloads, VST and Instrument Packs for FL Studio, Pro Tools, Logic, Ableton, and how to use the most popular free DAW Software, Fruity Loop Plugins, MIDIs and more.
Ableton Live, Apple Inc’s Logic Pro X and Steinberg’s Cubase are the world’s most prominent DAWs. This is a unanimously accepted fact! Then there are the lighter ones like Reaper, FL Studio and GarageBand that are favorites among beginners and intermediate level music producers. Amidst these mighty market leaders, the Studio One from PreSonus has been silently making inroads into the market over the past few years. Ever since its debut in late-2009, word of mouth has been proliferating among music producers around the world about its highly user-friendly interface. The latest versions have leaped ahead of several mainstream competitors with the enhanced drag and drop feature that facilitates an incredibly fast workflow. This makes it equally ideal for both studio and stage environments.
Though Studio One debuted in 2009, its legacy dates back to the late 90s. Matthias Juwan’s 1999 university thesis project KRISTAL (officially released as KRISTAL Audio Engine) became the basis for Studio One. Codenamed K2, the development of the next generation KRISTAL commenced in 2004. Shortly, Juwan co-founded the company KristalLabs Software Ltd. with former Steinberg employee Wolfgang Kundrus. The source code and development of K2 were licensed to the company though the ownership of the original KRISTAL software wasn’t acquired. Kundrus who was among the early developers of Cubase teamed up with Juwan to head the development of K2, aiming to produce a streamlined and versatile DAW. Subsequently, KristalLabs found support from American tech giant PreSonus. Development was accelerated and K2 was soon rechristened as Studio One. By the time a stable version of the application was ready to debut, KristalLabs had become a subsidiary of PreSonus. The DAW was compatible with both Windows and Mac platforms. Version 1 saw several revisions and updates till 2011. Version 2 released in 2011, with the integration of being a major breakthrough. Melodyne being an expensive standalone pitch-correction software was now available as a part of the package. The development of the ARA (Audio Random Access) plugin facilitated this.
Read: A Brief Introduction to DAWs
PreSonus offers three variants of StudioOne to its users. The Prime version comes with a free license and is ideal for beginners as a gestating platform before purchasing an Artist Professional license. You would be required to upgrade to the Artist or Professional to avail some of the professional features. The Artist edition is fairly feature-rich. However, it only offers a trial version of Melodyne while various other features like Groove Delay, IR Maker and Open Air are totally absent.The Professional edition is the fully-loaded version of Studio One.</span PreSonus offers a subscription package at $15 approximatrely per month or $164 per annum. The Studio One Professional version is among the various other software tools available with the package. If you don’t want to subscribe, you have the option make a one-time payment and purchase the Studio One license. The fully loaded Professional edition priced at almost $400 is much cheaper than Steinberg’s Cubase Pro or FL Studio. Apple poses a challenge to PreSonus, having priced the Logic Pro X at $200. However, being compatible with both Windows and Mac gives the Studio One and edge.
Let's get started with the Studio One interface.
The Start screen that greets you once you open the application could be quite overwhelming. However it isn't complicated as it may seem.
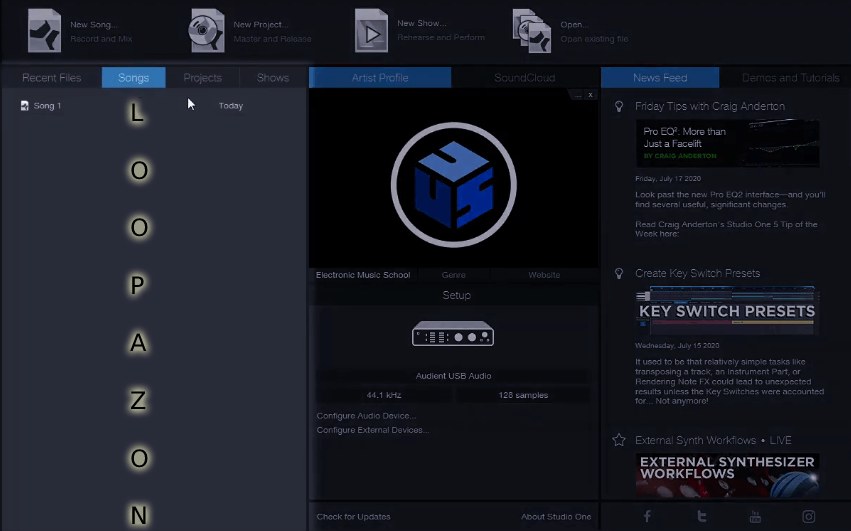
Clicking on the Songs, Projects or Shows tabs will list the saved items in the respective categories.
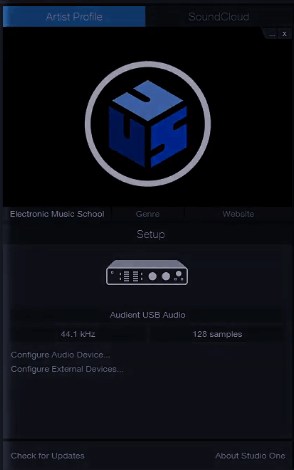
To setup your audio interface, click here.
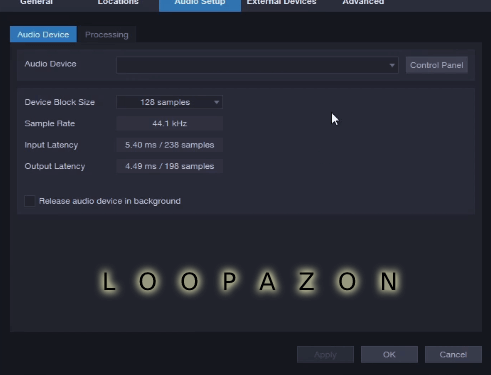
Do make sure that your desired audio device is plugged in. In the next window, select your audio interface in the audio device tab.
Now you are ready to create a new song. Click on the NEW SONG icon on the top-left side of the start screen.

Choose EMPTY SONG and NAME your file and choose its destination folder. Also choose your audio resolution and tempo. Make sure you enable the check box beside Stretch Audio File to song tempo. This ensures that any audio file you import to the session will be stretched to match the tempo of your song. This is one of the main reasons why Studio One asks you to set your song tempo before you enter your session. However this is only recommended for beginners. Intermediate and professional level users would prefer importing audio files with similar tempo, as alteration to the imported file could affect its sound quality. This could sometimes create a conspicuous quality difference between the existing audio in your session and the tempo-matched imported audio. This is undesirable in a professional recording.
Click OK to enter your Studio One session.
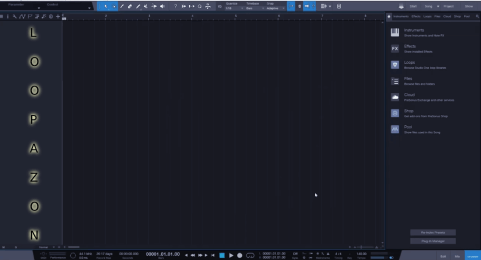
The Studio One interface is simple and reminiscent of many mainstream DAWs like the REAPER. However it does have its own characteristic differences and has made a lot of things easier. You may already be feeling at home if you have toyed with DAWs like REAPER or GarageBand. Even otherwise, the Studio One interface could be total fun for beginners. Similar to GarageBand, Logic Pro X and Cubase, you have the Right hand side of the interface offering you all the built-in virtual instruments,effects and loops. You may hide or show this by clicking on the browse button below. Beside the Browse button, you find your mix and edit buttons.
Read: Getting Started with GarageBand
Similar to the Logic Pro X, Studio One offers an INFORMATION button. Click on the ‘?’ button to enable this.
Once enabled, this will display information about the various elements in Studio One once you hover your cursor over them. The information will be displayed under the toolbar in a non-intrusive way contrary to other DAWs. This tool will be helpful to new users in their first few weeks with Studio One.
We did mention about the incredibly user-friendly drag and drop feature of Studio One. You can straightaway start working on your maiden session by trying out some built-in samples or loops from the library. Unlike most of the other mainstream DAWs we have discussed, you don’t need to create a new track every time. You may omit that step and straightaway drag and drop samples from the browser to any row in the interface. Studio One automatically assigns tracks for each row. You may alternatively right-click on the track panel to create a new track. The two types of tracks in Studio One are Audio andMIDI tracks. The audio track is for audio files while theMIDI track is to work with virtual instruments.

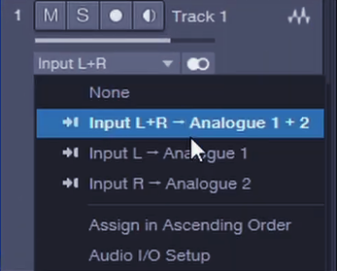
On the left hand side of each track, you have the track controls.
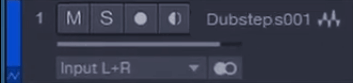
The M button is for muting the particular track while playing other tracks. The S button does the exact opposite. It enables the SOLO mode. So when you press play, it automatically mutes the other tracks and plays only the SOLO-enabled track. The next one with a circle is obviously for recording. This is used to arm the track before you record a voice or an instrument.
Click and drag on the instrument track to create a selection/MIDI clip and then double-click on the selection to open the piano roll.
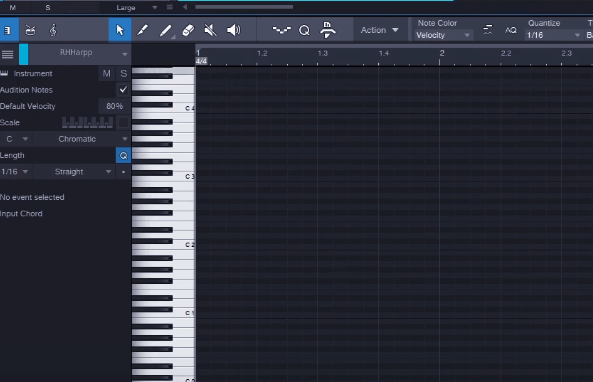
Here you can create the sequence of notes you want in your MIDI clip.
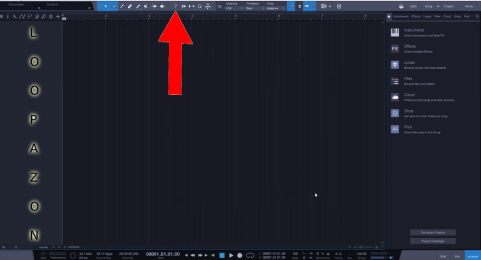
Contrary to most other mainstream DAWs, you find the PLAY, STOP and RECORD controls at the bottom of the interface.
![]()
These symbols, except the last one are self-explanatory. We shall soon get to the last one, which is the LOOP symbol.

You did set the tempo of your song on the Start screen. However if you wish to change your tempo, you may do it here:To RECORD from an external source, add a new AUDIO TRACK. Then, choose the input source for recording and click on the monitor button.
Click on the metronome button at the bottom of the interface to enable click tracks while recording.
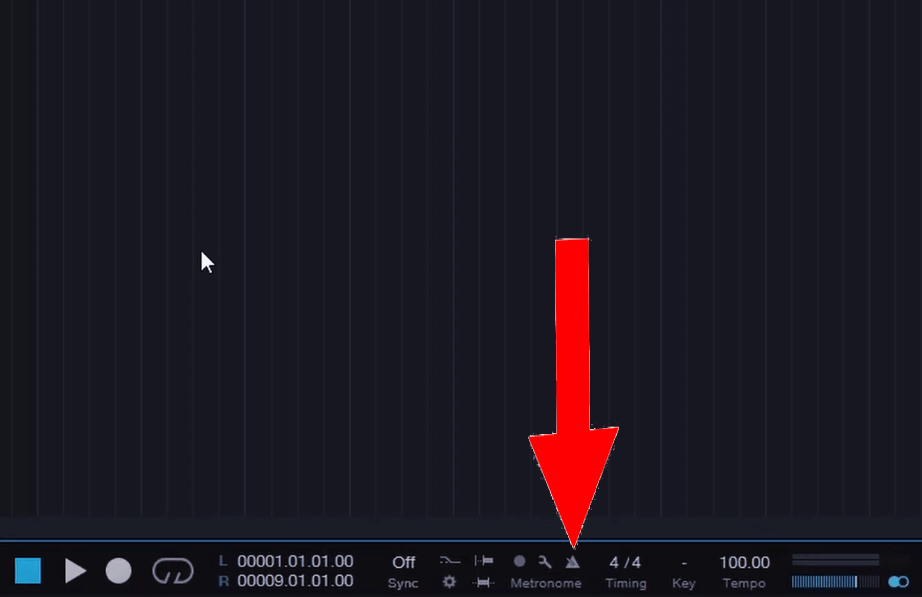
Click on the RECORD button when you are ready. Your input gets recorded on to the respective audio track on the timeline.
The symbol next to the RECORD button is the LOOP button. This is used to loop a particular selection in your track.
![]()
To make the selection, move your cursor over the time ruler. Once your see the pencil button, select the bar(s) or section by clicking and dragging over it. You may also click and drag the right and left edges of the selection to extend or shrink your selection. The selected portion is often referred to as a loop region or loop range. Once the selection is made, click on the loop button to enable it.To export you track, drag and make a selection and press on CTRL + E on your keyboard.

So that is about it. A quick basic glimpse into the Studio One interface for complete beginners. Those who have tried DAWs like Ableton Live, REAPER, GarageBand or Logic Pro X, or even followed Loopazon’s articles on them, wouldn’t find anything new or much different in this introductory article on Studio One. As you can see, there is a lot more left to explore in this interface. The various tools and controls deserve a separate article.