
Getting Started with Sound Forge
Form a band online, promote your music, buy custom beats, sound parts, and share your Beat or Track as a Royalty Free loop with us. Collaborate to make beats online with the best loop makers from around the world on the Forum for musicians and beat makers. Keep up to date with Music News and learn from FL Studio Video Tutorials and the articles on the Blog. Free DAW Music Software downloads, VST and Instrument Packs for FL Studio, Pro Tools, Logic, Ableton, and how to use the most popular free DAW Software, Fruity Loop Plugins, MIDIs and more.
We did discuss at length about Adobe Audition, the undisputed leader in the desktop sound editing realm. The application has remained the industry standard for close to two decades now, with its popularity burgeoning after the acquisition by Adobe in the early 2000s. One of its best alternatives since early days has been Sound Forge, which was largely overshadowed by the overwhelming popularity of Audition. Nevertheless Sound Forge has remained one of the best dedicated waveform editing suites. Having initially struggled, later flourished and then languished under multiple ownerships, Sound Forge has a long history and continues to exist as a favorite among audio editors and enthusiasts at all levels. Dozens of audio editing applications have hit the mainstream over the last two decades, with many of them being so feature-rich, exhibiting almost DAW-level capability. However, Sound Forge continues to serve as a user-friendly, utilitarian choice for many veterans as well as budding audio editors.
Read: A Brief Introduction to DAWs
The application was developed by Madison-based software-maker Sonic Foundry in the early nineties. It was initially designed to work exclusively on the Windows platform. The initial versions were almost completely written by Monty Schmidt, the founder of Sonic Foundry. Schmidt’s accomplishment was almost a quantum-leap during the time, when flawless recording and mixing of sounds on personal computers seemed to be a thing that was still years away. During his stint as an ultrasonic equipment designer at Madison-based Lunar Corp., Schmidt heard about the SoundBlast audiocard that maximized the prospects of recording and editing sound on personal computers. He quickly started writing an application that would enable recording, editing and mixing of music and subsequently founded the startup, Sonic Foundry. He soon started selling early versions of Sound Forge for $25.
Soon, the application attracted the attention of Curtis J. Palmer, a software developer at Microsoft. Schmidt coaxed Palmer into buying stake in the company. Macromedia licensed one of its versions to offer a customized version as a part of its software suite Macromedia Director Multimedia Studio. However, things weren’t going very smooth for folks at Sonic Foundry. Sound Forge being a Windows-exclusive sound editing application pulled them back from reaching out to a larger market, as most professional music producers and audio engineers were working on Apple’s Macintosh platform. The Macromedia deal that was sealed in the mid-nineties helped the company sustain and eventually turn profitable. However subsequent bundling deals couldn’t help the company sustain for long. With losses mounting beyond comprehensible limits, Sonic Foundry was forced to sell off its flagship desktop products, Sound Forge and Acid PRO to Sony Pictures Digital at a whopping $18 million.
Under Sony’s newly-formed subsidiary Sony Creative Software, Sound Forge flourished among other applications for some years until it entered a period of stagnation in the early 2010s. In 2016, Sony sold its subsidiary to Magix Software GmbH. After several years of stagnation, yet never ceasing to exist, Sound Forge along with former Sonic Foundry sibling Acid PRO, found its most appropriate home at Magix. Unlike Sony, the German software giant has a legacy of more than two decades, having produced popular multimedia applications since the early nineties including the largely popular Samplitude and Magix Music Maker. The current stable versions of Sound Forge were released a few months ago, as two editions; viz. Sound Forge Pro 14 and Sound Forge Audio Studio 14.
Read: An Introductory Glimpse into Adobe Audition
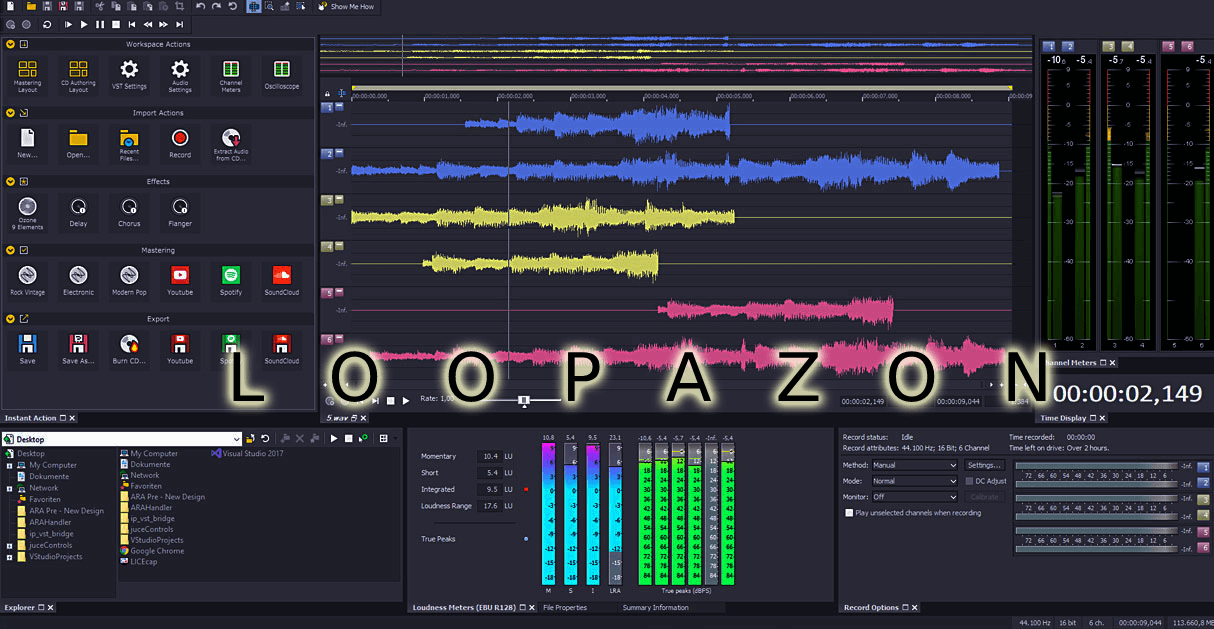
Let us take an introductory tour of Sound Forge Audio Studio 14. We shall be working on the Podcast layout. Beside the default layout, there are several other layouts you could switch to, that includes the Stereo Recording, Audio Editing, Mastering etc., each of these being preferred by editors purely on the basis of their primary task and comfort level. Go to the VIEW menu and select Windows Layout and choose from the several layouts available. After you initial weeks with Sound Forge, you would eventually find your most comfortable layout.
Read: A Glimpse Into REAPER for Beginners
Here is how the Podcast Layout looks:
Let us start toying with Sound Forge by trying out one of its most fundamental functionalities; RECORDING:
Go to the FILE menu and select NEW. Sound Forge will prompt you with the following window:
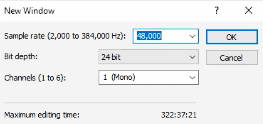
Here you select your sample rate, bit-depth and input channel(s). If you want CD quality audio, the suggested sample rate is 44100, while the standard bit-depth is 16-bit. Once this is done, you need to check your audio settings before you attempt any recording. This is to ensure that the correct input device has been assigned. To do this, go to the Options Menu and select PREFERENCES. There is hardly anything complicated here as the average Windows user would find this very familiar. It is your standard audio settings window. Go to the Audio tab. Select the RECORD tab and check whether the correct input device has been assigned to the channel. Click OK once you have the appropriate device assigned to your input channel. You are now ready to RECORD your input.
Click on the RECORD button to start providing audio input through your device. 
While recording, it is highly recommended that you use the MARKER function, whenever you feel that you have made an error or there is a slight imperfection. These MARKERS facilitate easier editing later. To use the marker, you just need to hit the M key on your keyboard, whenever you make an error while recording.
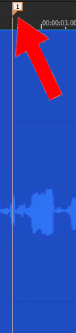
The marked portions in the audio will be listed in the bottom right panel of the Sound Forge interface. 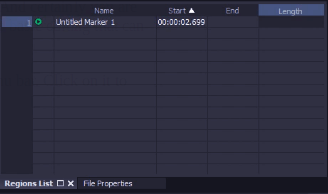
Clicking the listed markings in the list, you may directly jump to that portion during the edit. If you forget to do the marking while recording, you may do it in the editing stage.
Click on the STOP button once you are done with recording. 
You have performed the most basic function of SoundForge, RECORDING. And certainly you are waiting to edit your audio and add effects to it. Let us explore some basic editing that can be done to the audio besides adding effects to it.
You will find the EVENT TOOL among various others, right below the Menu bar. Click on it to start editing your audio. 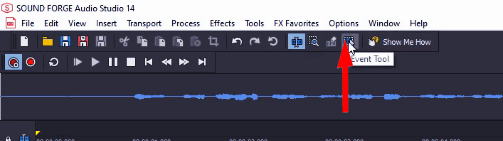
Once the EVENT tool is enabled, you can manually control and edit your audio waveform using the cursor. For instance, if you want to split the audio file into two parts, so that you may control and edit them separately, right-click on the intended area of separation and choose SPLIT. Now you can independently perform edits to these individual regions.
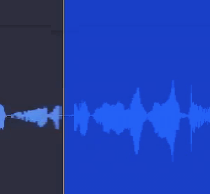
You may also drag them back and forth, or even create overlaps wherein Sound Forge would automatically create a crossfade. You may adjust the crossfade levels by pulling the curves with your cursor. Even without creating an overlap, you may add fade-in and fade-out by clicking on the top edge of the region and dragging your cursor to create a fade-in/fade-out curve.
To add an EFFECT to your audio track, use your cursor to select the region/portion in the track where you want the effect to be applied. Go to the EFFECTS menu or FX Favorites menu to choose the effect that you want to apply to your track. For instance, if you want to add a REVERB to your audio, go to the EFFECTS menu after making the region selection and then click on REVERB. In the effects window choose the appropriate reverb from the PRESETS, and customize it further if required.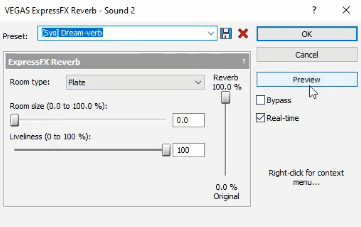
Click on PREVIEW to listen to the effect on your audio, before applying it. Once you are satisfied, Click OK.
The difference between EFFECTS and FX FAVORITES is that, the EFFECTS menu contains all your built-in Sound Forge effects while the FX FAVORITES would contain all your third-party fx plugins.
Though Sound Forge hasn’t been your traditional multitrack audio editor, it does allow you to additional layers of audio to your recording. By this you would combine multiple audio sources into a single track. This is helpful when you are doing podcasts wherein you may want to add background music to your voice recording. The bottom-left portion of your Sound Forge interface contains the File Browser. You may use this to browse through the folders in your system without exiting the Sound Forge interface. Once you find an appropriate audio file for layering your audio with, drag and drop it into Sound Forge. Please note that Sound Forge does not add the audio file to your existing track. Instead it creates a new audio file.
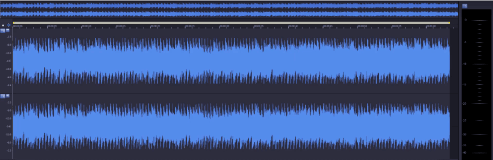
You will notice a new tab being created on top of your File Browser. Switch between these separate audio sessions by clicking on the tabs. Click and drag over the source audio to select the portion you want to copy. Click CTRL+C and switch to the destination audio tab. Click on the desired region on the destination audio track, to paste the new audio. The most important thing to note here is that, you should not directly perform a PASTE (CTRL+V) operation here. This would OVERWRITE the existing audio. Our intention is to blend both these audio tracks. Hence, go to the EDIT menu, select PASTE SPECIAL and click on Me. You may perform the same operation with a CTRL+M keyboard shortcut. Sound Forge will now prompt you with a Mix/Replace window. 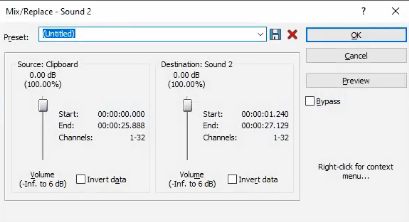
Here, you shall adjust the volume levels of the source and destination audio. In most instances, the source audio is set to a lower volume level, especially if you are intending to use it as background music for your voice recording. Click you PREVIEW while making the adjustments so that you can listen to the change before applying it. Once satisfied, click OK. Your audio will successfully be blended with the destination audio exactly as you intended.
To SAVE your session, click on SAVE AS and select the default Sound Forge Audio Studio format and save it to your desired destination folder. This would enable you to comeback to your session and make changes in the future. To EXPORT it as an audio file, click on SAVE AS, select from among the standard audio formats like WAV and MP3 and save it to your desired destination folder. So that much would be good enough to get you started with the legendary Sound Forge.