
Introduction to Samplitude
Form a band online, promote your music, buy custom beats, sound parts, and share your Beat or Track as a Royalty Free loop with us. Collaborate to make beats online with the best loop makers from around the world on the Forum for musicians and beat makers. Keep up to date with Music News and learn from FL Studio Video Tutorials and the articles on the Blog. Free DAW Music Software downloads, VST and Instrument Packs for FL Studio, Pro Tools, Logic, Ableton, and how to use the most popular free DAW Software, Fruity Loop Plugins, MIDIs and more.
We did have an introductory tour of Magix Music Maker, one of the earliest DAWs, that debuted in 1994 and continues to be a hot favorite among Windows users who wish to start producing music.
Samplitude, the elder sibling of Music Maker too ought to be discussed as it was the first full-fledged professional Digital Audio Workstation sold by Magix. While Music Maker was aimed at hobbyists, amateurs and beginners, Samplitude was aimed exclusively for full-time professional music producers for recording, mixing, mastering and editing music. Even today, Samplitude continues to be a gestating platform for music producers and audio engineers before they migrate to more comprehensive industry standard options like Cubase and Pro Tools. The application originally developed and marketed by German software company SEK’D was completely acquired by Magix in 1998. Magix used the Samplitude as a base to enhance its existing DAW Music Maker, which was a beginner’s DAW. Samplitude too flourished under Magix competing with market leaders like Pro Tools and Cubase.
Read: Beginner's Sneak Peek into the Logic Pro X Interface
Initially SEK’D had developed and released Samplitude with 24-bit audio processing for Commodore’s Amiga series of personal computers powered by the Amiga operating system. This version which debuted in 1992 was soon followed by Samplitude Pro II, which came with HDR (Hard Disk Recording). The feedback to the second version was excellent among users and reviewers despite which Samplitude did not see a boom as it was limited to the Amiga platform. Engineers of the first two versions oversaw a major overhaul to the application, to make it compatible with Windows-powered personal computers, which were unarguably the most popular in the world. By early 1995, a stable version of Samplitude developed for the Windows 3.1 operating system was ready for release. This version was by far a major departure from the first two versions that were developed exclusively for Amiga systems as the full version (Studio) featured 16-track editing, built-in filters and external sync. The scale down versions Samplitude Pro and Samplitude Multimedia offered 8-track and 4-track audio editing respectively. After the acquisition by Magix subsequent versions integrated support for VSTi plugins, ASIO drivers etc. The Samplitude 8.0 released in 2005 included a beat-mapping tool inspired by ACID Pro and a virtual drum machine. It also enabled 5.1 surround mixing. Samplitude has evolved over the years, but has retained its unique selling point, the object-oriented work-flow.
Let us take an introductory tour of the latest version of Samplitude, the Pro X5 edition: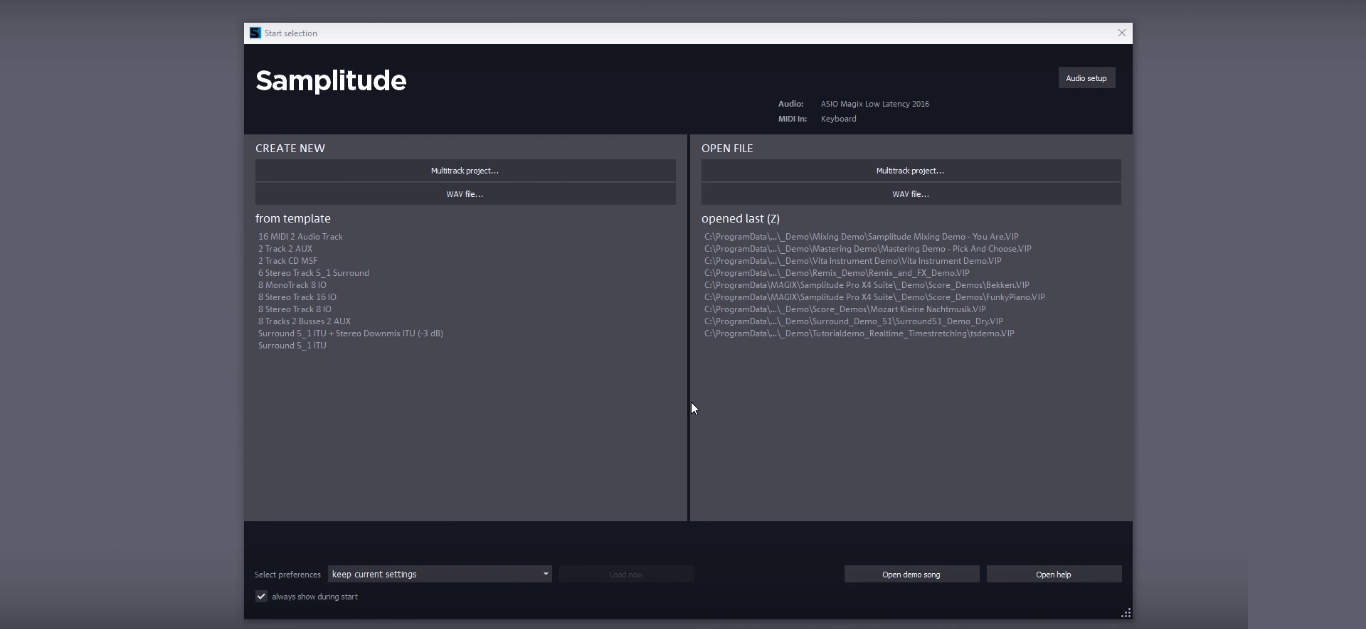
This is the intro screen of your Samplitude interface. One the left-hand side, you may click on (Create New) MULTITRACK PROJECT to create a new project on Samplitude. You may also create a new audio file in the WAV format by clicking NEW WAV file.
To open existing projects, click on (Open File) MULTITRACK PROJECT on the right-hand side of the intro screen. You may also load an existing audio file by clicking the WAV FILE button.
To traverse through the features of Samplitude, let us load an existing file. Do not worry if you have just installed Samplitude and are without any existing project. You may click on the Open Demo Song button on the right hand-side of the intro screen. This would load an existing Samplitude session Magix has included with the latest versions.
The following is the project session of the Demo Song that comes with Samplitude.
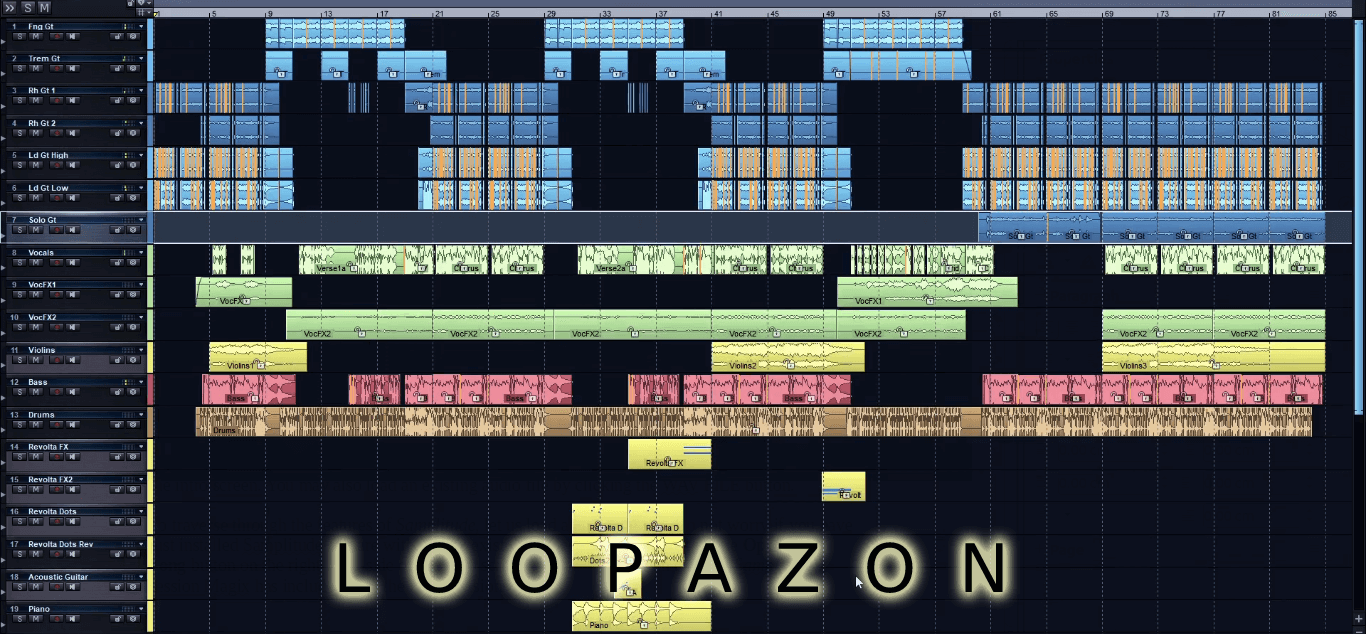
If you have worked on any other Digital Audio Workstation, this session view would not be alien to you. On your first glance, this is your traditional multi-track editing timeline. Even if you are totally new to DAWs, do not be intimidated by this snapshot as a simple explanation could get you started with editing and creating new projects on Samplitude.
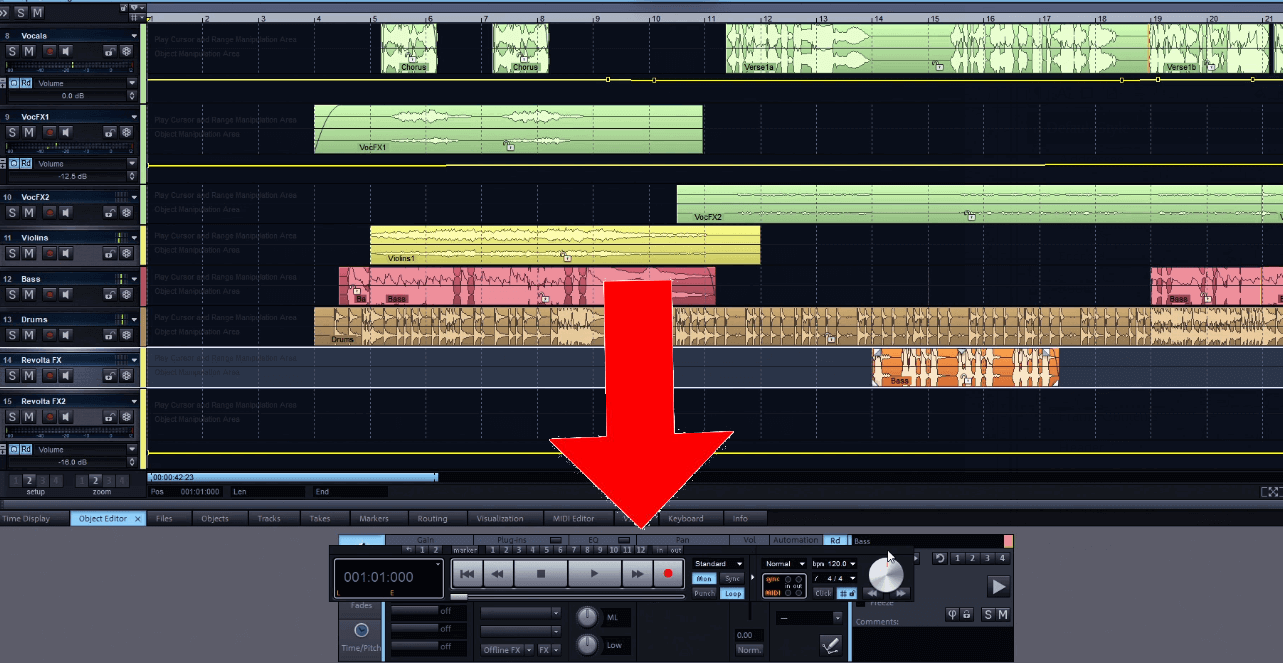
You may play the demo song first. To play the song load the Transport Control from the View menu.![]()
The transport control contains the PLAY, STOP, REWIND, FORWARD and RECORD buttons. The various elements you hear in the song lie in these multiple tracks. Each row is a track. This is similar to almost every other mainstream Digital Audio Workstation.
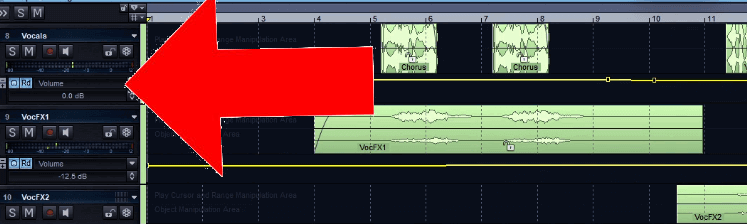
The horizontal lines between various tracks are Curves that you may manually control with your mouse to adjust the volume level of each element.
As mentioned earlier, the unique selling point of Samplitude is its object-based workflow. The multitrack editor not only allows you to work individually with each track, but also facilitates splitting each track further into multiple segments called Objects. You may individually work with each object in the track if you don’t want to apply common changes to an entire track.
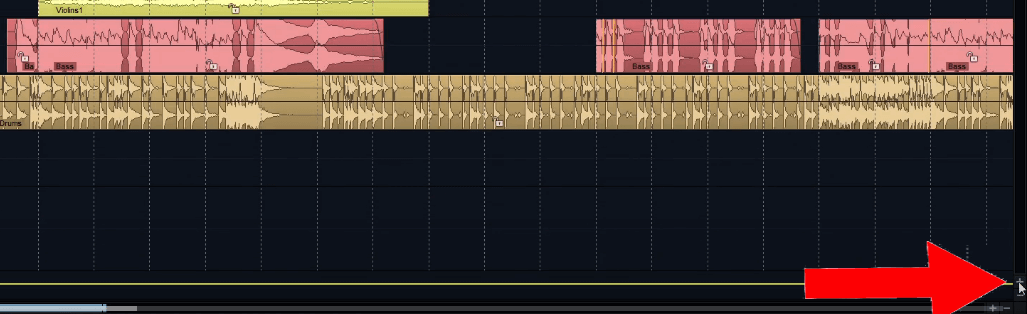
Big sessions in Samplitude may have you working with dozens of objects in multiple tracks. Use the Zoom-in/Zoom-out control (+, -) located at the bottom of the vertical scroll bar in Samplitude.
Double-click on an object to open the object editor.

Here you may individually work with FX, EQ (Equalization), fades and pitch-shifting. Any changes you make here will be exclusive to the object and the rest of the track remains unaffected.
Suppose you want to perform changes only to a portion of the object, you may split a single object into two or more objects. To do this, move the timeline playhead into your desired point of separation and press T on your computer keyboard. You can move these individual objects to anywhere within the track.
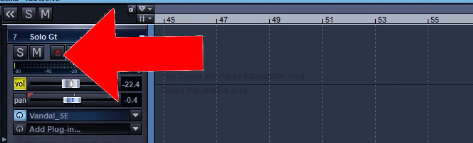
This easy object-based operation has given Samplitude a major edge over many of its competitors that restrict you to track-based editing. To perform traditional track-based editing, go to the track controls located on left-hand side of each track.
Any changes you make here will be applied to the entire track, I.e, to each individual object in the track. You should always be very careful while using this, as you could roll-back some crucial changes made to individual objects. The S (SOLO) button on the track controls is used to activate the particular track and mute every other track in your session while playing back. The M (MUTE) button does the exact opposite by muting the particular track and activating the rest for playback.
More comprehensive track-based editing, can be done using the Track Editor. Invoke the track editor from the VIEW menu. The editor appears on the left-hand side of your traditional track controls.
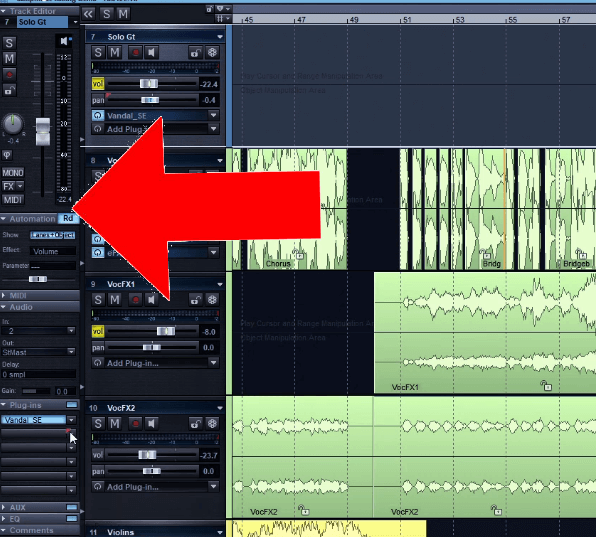
The track editor features a vertical volume fader and a knob-controller to adjust the stereo settings of your selected track. You can also make various other adjustments with the track editor including EQ and Plugin settings.
The Plugin browser in the track editor allows access to all the plugins and effects. However, you should be careful again here, as any change you make here will be applied to all the objects in the track, rolling back adjustments you had made to individual objects.
We have demonstrated the Samplitude interface with an existing demo session. Now let us see how you create a new project. Any Windows user would have guessed it right! Yes, go to your File Menu, and click on New Virtual Project.Alternately you can use your keyboard shortcut, E.
In the next Window, select the number of tracks you need on your project session, name the project and click OK.
An empty Samplitude session will be loaded. Make sure you have the appropriate input settings before you start working on the project. Click on the Y key on your computer keyboard to load the Audio Setup Window. 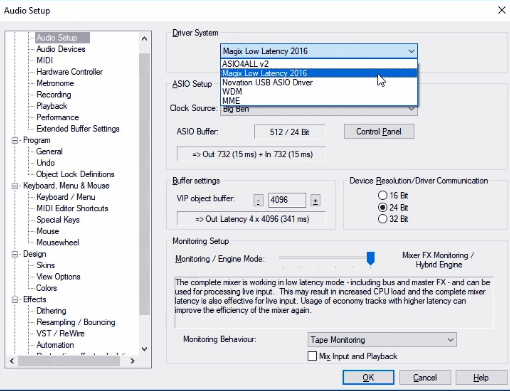
Select the Magix Low Latency Driver as your driver system. From the MIDI tab, select the MIDI keyboard that you are intending to use for MIDI input in this project. You may also traverse through the Recording and Playback tabs to assign appropriate input and output devices.
You have an empty multi-track Samplitude session. To load an existing audio track to the session, select the track where you want to load it to, go to the File Menu and select Load Audio File.
You can alternately use the keyboard shortcut W. In the next Window, select the Audio file you want to load on to your track. If you have selected multiple tracks, you may decide the sequence/order of their placement in your track.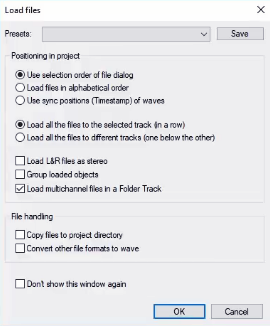
You may be eager to work with Virtual Instruments. Select the track where you want to work with MIDI tracks. On the track controls, go to Add Plugins and cliCk on the inverted arrow symbol. From the MENU that pops up, select Plugin Browser. This browser gives you access to all the Instruments and Effects plugins. 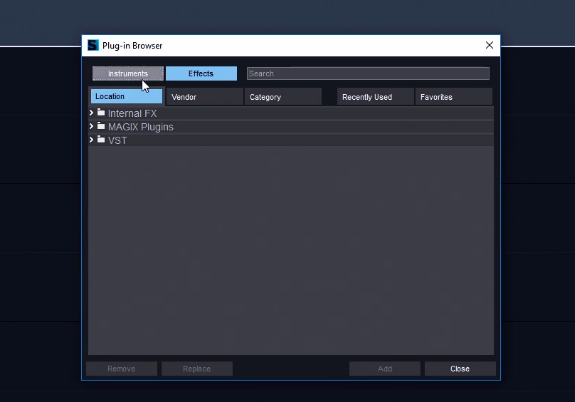
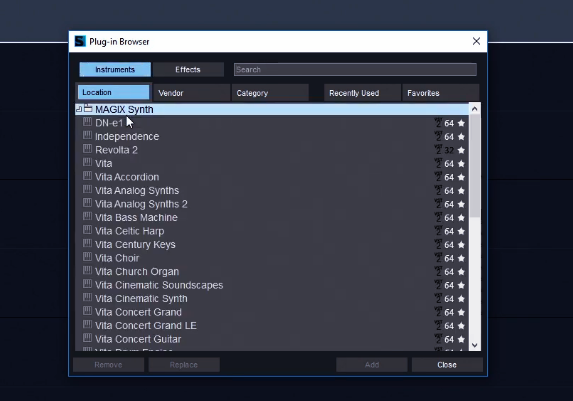
Click on Instruments and select from the available virtual instruments.
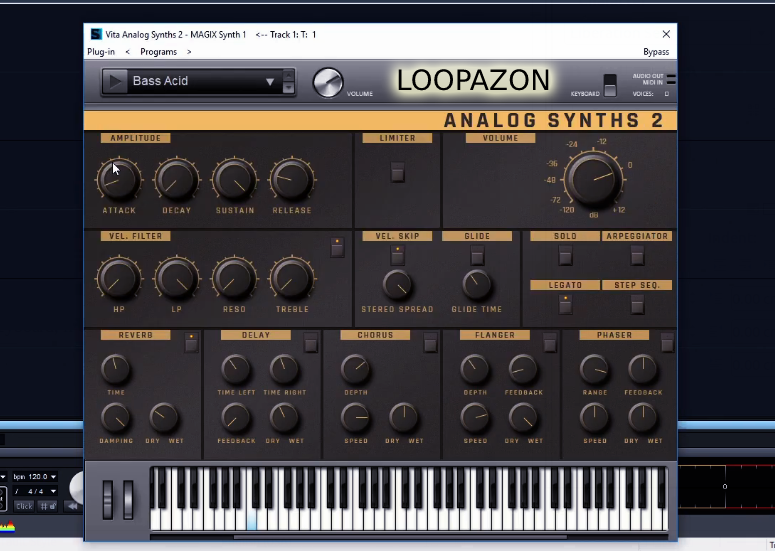
In the Instrument Window, you can make additional adjustments and play the virtual instrument using the on-screen keyboard or your MIDI keyboard, if connected.
You may prefer to RECORD the Virtual Instrument directly using the MIDI recording feature. To do this, click on the RECORD BUTTON on the track controls to arm the recording.
Once you are ready to record, click on the RECORD BUTTON on the Transport Controls.
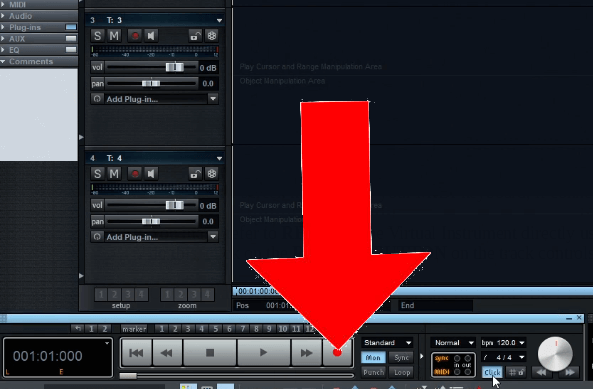
Click on the CLICK button to turn on the metronome, to enable click tracks while recording.
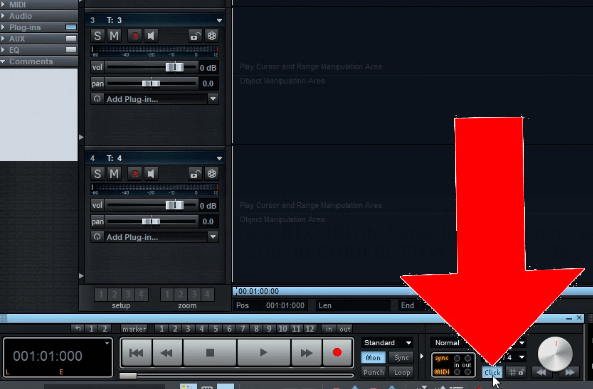
Your MIDI input will be recorded to the assigned track on the timeline.
Audio too is not very different. Before you arm you recording on the track controls, right-click on the record button (on the track controls) and select the appropriate Audio Input. After this, left-click on the record button to arm your recording. Once you are ready to record, click on the RECORD BUTTON on the Transport Controls.
To EXPORT your project as an Audio File, go to the File Menu, select EXPORT.
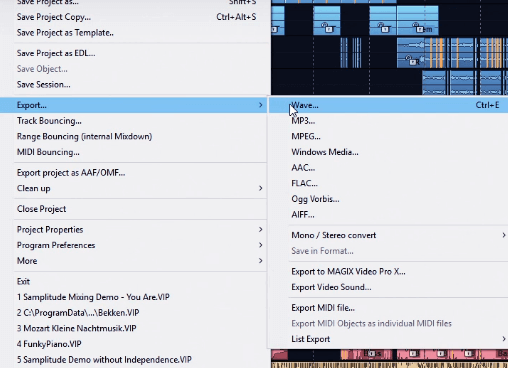
Choose your desired audio format and save the file.