
Walkthrough FL Studio for Beginners - How will I learn all this?
Form a band online, promote your music, buy custom beats, sound parts, and share your Beat or Track as a Royalty Free loop with us. Collaborate to make beats online with the best loop makers from around the world on the Forum for musicians and beat makers. Keep up to date with Music News and learn from FL Studio Video Tutorials and the articles on the Blog. Free DAW Music Software downloads, VST and Instrument Packs for FL Studio, Pro Tools, Logic, Ableton, and how to use the most popular free DAW Software, Fruity Loop Plugins, MIDIs and more.
There are dozens of applications for aspiring audio editors to start experimenting with. However most of the fully-loaded ones are either prohibitively expensive or come along with other software packages. If the purpose is to just record, edit and export audio in professional quality, then you don’t really need a DAW.
Are you a beginner to music-making or FL Studio? Then you are in the right place. Have these thoughts ever come to your mind after seeing the FL Studio’s interface?
“How will I learn all this?”
It’s a well-known fact that most of the music makers lose hope at this stage. They avoid putting too much effort into learning their application software (DAW).
The most popular excuse is:
“These controls are difficult to understand. I have an amazing beat in my mind. But I cannot make a simple song even after spending plenty of hours learning this interface.”
In this guide, we are going to teach you the making of music in the least possible time. We will do that by breaking down the main features of FL Studio.
Note: This guide is for FL Studio 20 Producer Edition.
Introduction
Here is the interface that will appear when you open FL Studio.
The FL Studio is amazingly customizable, all the windows can move around as per your wish. It is a magnificent ability of FL studio unlike the other DAWs like arch-nemesis, Ableton Live. Only the toolbar at the top of the screen is fixed. Besides that, all the things are moveable. This how it is going to look initially. At the top left, you will find File, Edit, Options, and much more. The listed variety of various buttons and knobs on the interface makes it easy to go. So you need to move beyond these.
Transport

The transport section is available in the center. It has clear play, stop and record buttons for playback. "Pat" and "Song" options are also available in this section. They allow switching between the "Arrangement" and "Channel Rack" of what is playing. This lets you move between creating a complete track as well as trying out ideas, quite easily. Time counter along with multiple buttons and some visual effects are present here. This helps with observing the current usage of the CPU of your computer. It also helps to visualize and time your track.
Snap
Below the “Line” on the above image, there is a universal Snap control available. It controls the snapping of the grids across the piano roll and arrangement. This means that it quantifies everything to a specific interval in time across the track. You will be able to see the determination of the levels specifically further below.
On the right side, some important main view buttons are also available. We will also discuss them later.
- The Arrangement,
- Piano Roll,
- Channel Rack,
- Mixer, and
- Browser
These options above are available from left to right. Here, we will start with the browser.
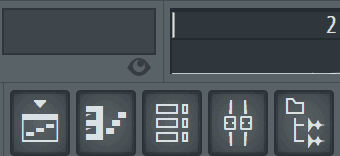
Browser
All material, be it sample presets or instruments, comes to the FL studio through the browser. Consider being a craftsman who works with resources like
- leather,
- wood, and
- metal
They would have these materials above as well we all the required tools to create products.
The browser in FL studio serves the same purpose for all music makers. It has some folders by default. The main ones should be a preference.
Packs
All FL Studio default sounds are available in the Packs. Once you get to know how to use them you will start liking them. A variety of sounds like drums, loops, FX, and others are also available. The usage of the Channel Rack section is later explained below.
Current Project
The current Project folder can be either:
- Accessed by clicking on the paper icon, OR
- Navigated to this folder
All the items whether automation clips, actions, or anything is done in your project is here. You can find all the available material here. You would not have to go through different windows.
Plugin Database
The Database window can get plugged into the main view. You can do this by clicking on the “plug” icon at the top right of the browser window. It is like the Current project work.
All the effects and instrument plugins are available here. It also shows the third-party VSTs or plugins if any added.
Add Your Plugin
It is a fact that most of the users want to add their samples to the browser. To do this, follow the steps mentioned below.
- Go to options > File Settings.
- There, click on the spare folder slots which will allow you to choose a folder.
- Select the folder that has the samples you wish to add. This way, your samples will appear in the “Browser” window.
Channel Rack
Channel Rack can be a considerable workbench. It enables music makers to bring ideas and patterns to life. Channel Rack is large. It is a part that differentiates it from other DAWs in the market. This makes it an important part of FL Studio.
Basics
It comes preloaded with 4 stock sounds. You can use these, but you must use your browser knowledge to find some good sounds.
These user-added sounds can move into a new slot. This will automatically create a new sample. You can even drag them over existing sounds. The “Menu” located at the top left contains a lot of options. We may not explain all the options here. But you can explore them all yourselves. Most of these options are self-explanatory.
The entire pattern can get looped through a loop mode button next to it. The different groups of channels can get selected on the menu (where it says “All”). The new channels can get added down the bottom.
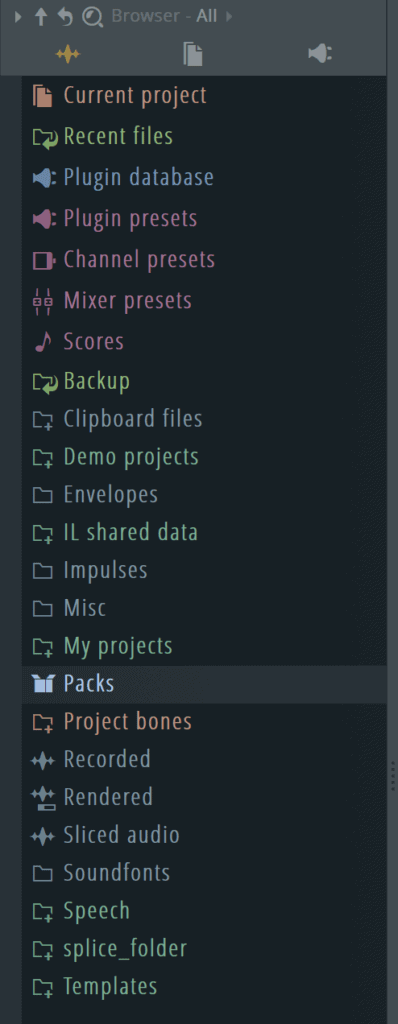
Step Sequencer
This is the key part of the Channel Rack. It allows quick sketching of ideas. Left-clicking on the box allows you to add a step. By dragging your cursor across, you might be able to add multiple steps. Right-clicking on the box allows deleting a step. You can also get it done by the dragging option. The title of each channel box displays a thin LED on the left side of the sequencer.
The current channel gets selected by left-clicking the LED. Once done, the LED gets lit up. It can also happen when the box with the name gets clicked. After you select the box, you may use the applicable menu settings. We have discussed this earlier under the "Menu" option.
Other Controls
Few knobs and buttons are available on the left side. If the LED is green then the specific channel is on. You can turn them on and off by left-clicking the Channel. These Channels can be converted to solo by a right-click. The panning and volume control knobs are next to the LED. It is very natural when you are in a flow and is great for mixing on the go without having to bring up the mixer. Mixer routing gets determined through the knobs next to the number. Mixing routing is further discussed in the mixture section of the guide. There are few more buttons on the top right.
When you click the mini step sequencer buttons, it swaps all steps to notes on the piano roll. We have explained it further in the next section. When you click on the bars, it brings the graph editor up. This would allow you to finetune the velocity, pitch, and other parameters of each step/note.
The length of the pattern determines through the number on the left side of that control (in 1/16th notes). It is 16 by default. The swing amount is a timing effect that alters the notes to sounds that are more human and groovy. People with some music theory knowledge will find the limitation of a sort in the step sequencer. These limitations are further explained in the Piano Roll section.
Piano Roll
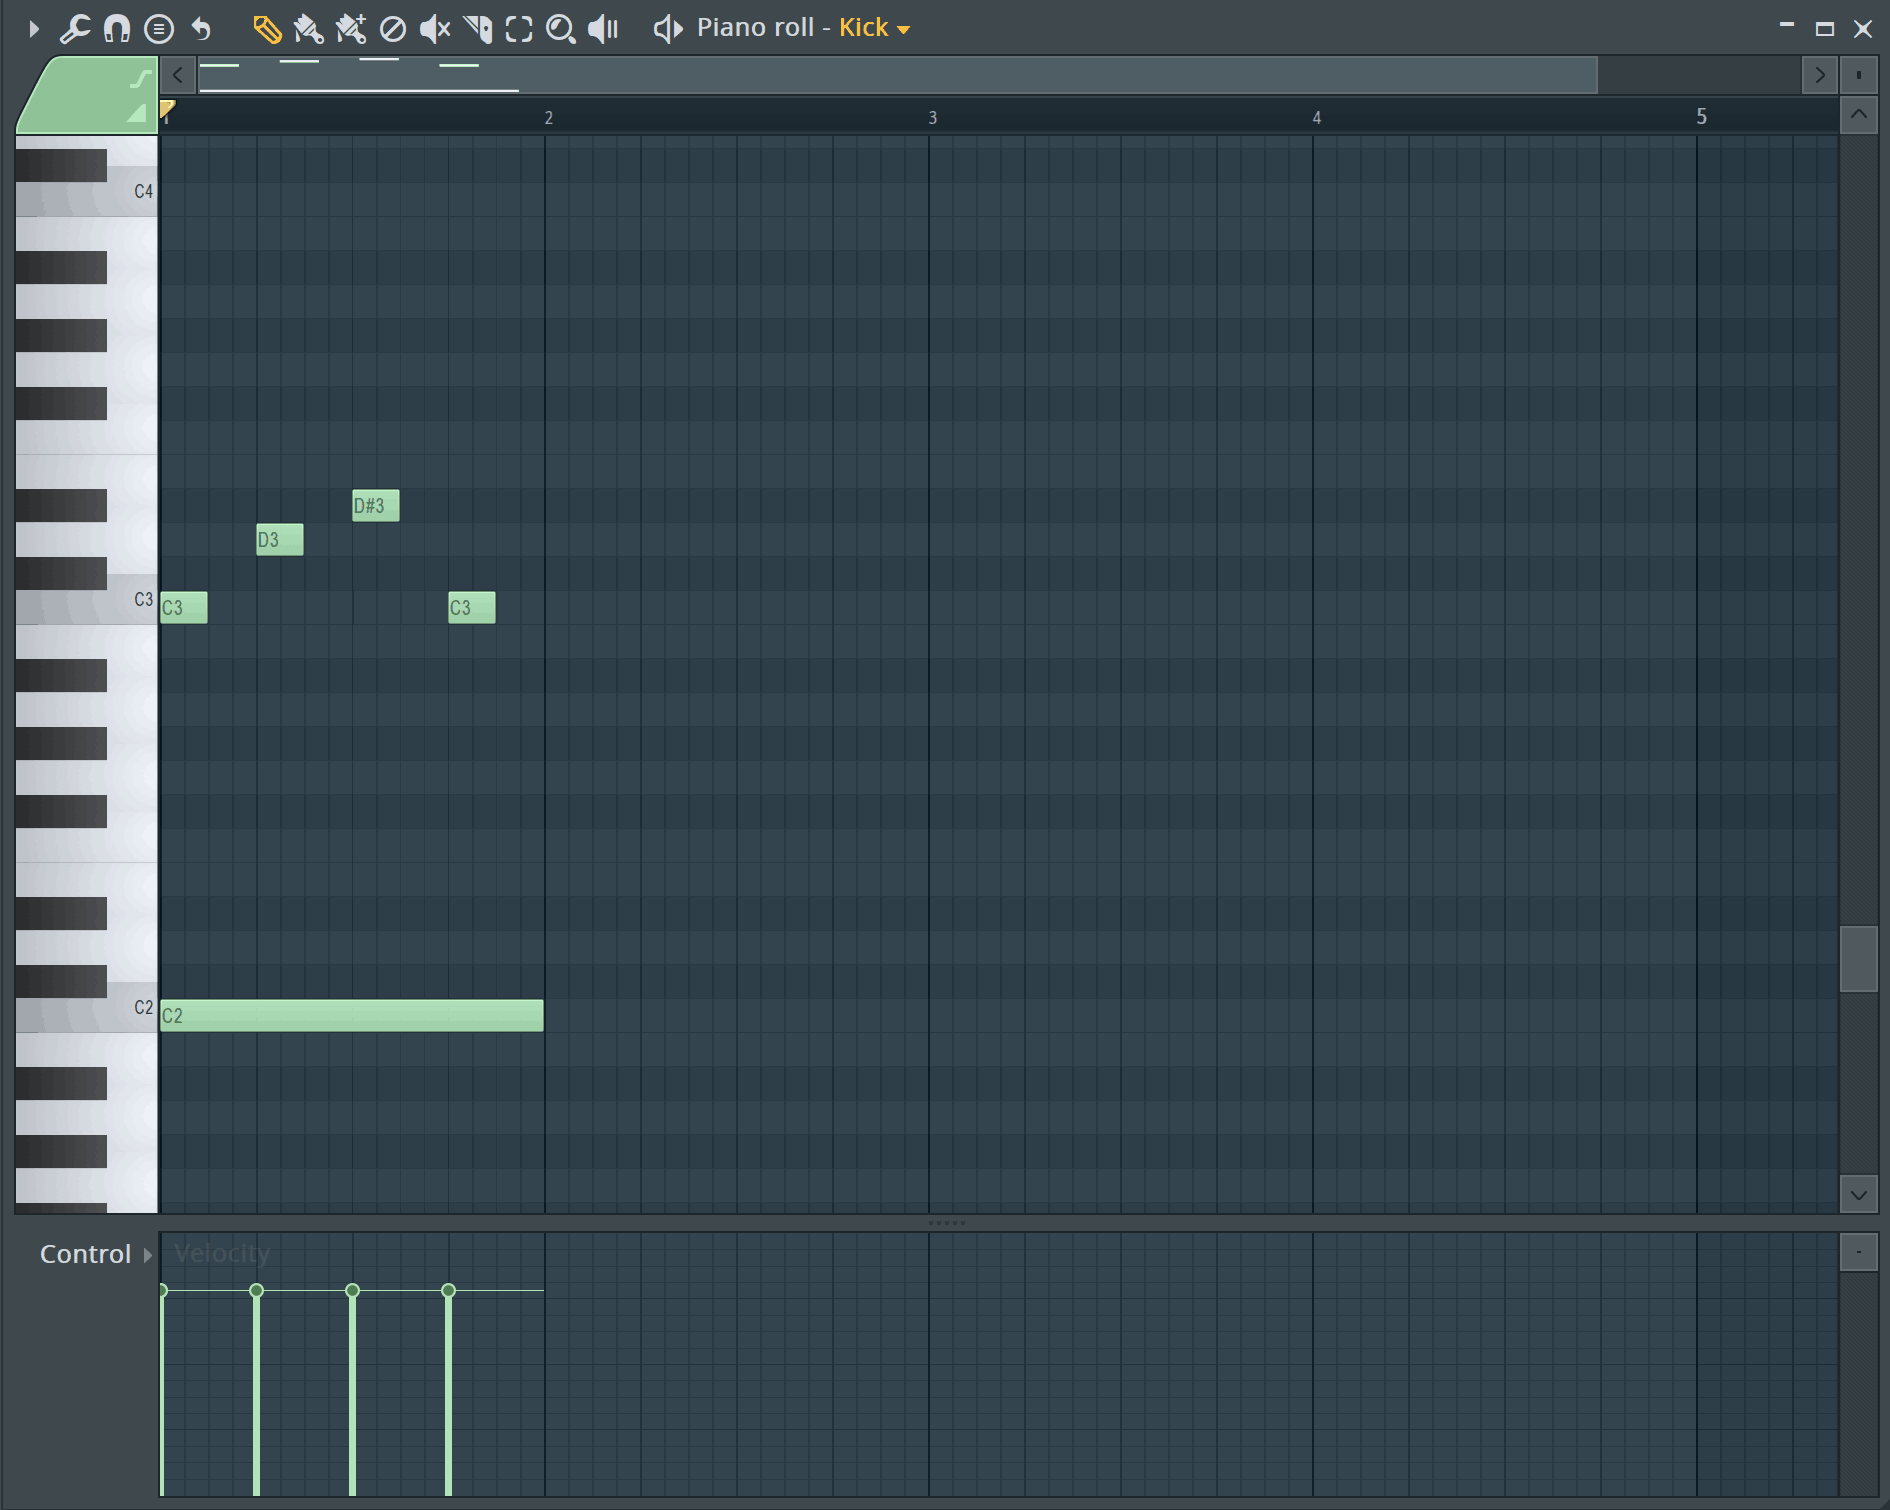
Piano roll is a powerful part of the Channel rack. If you find that the step sequencer unable to meet all your requirements, then the Piano roll will come in handy. It will allow you to make melodies, complex rhythms, chords, and patterns. The amazing piano roll and seamless functionality are the main reason for FL Studio’s fame. You will fall in love with it after putting a couple of notes.
This is a thing that the users of Ableton usually miss.
Basics
Piano rolls and step sequencers have the same way of drawing steps. To change the timing and pitch here you have the options of dragging up, down, left, and right.
The duration of the note can change to longer or shorter by dragging the end of the note with your mouse. Each note’s velocity is available at the bottom. These values can get adjusted by a left-click and dragging. Also, an option is available in the control dropdown menu to alter what is being changed.
Tools
The piano roll is self-sufficient enough to be its program.
Discussed here, are a few key features. These will help you with beating out chord evolutions in the least possible time. Let us start with the main tools on the toolbar:

- Draw: The notes are drawn and moved here
- Paint: By dragging, it paints and repeats the notes
- Paint (sequencer): By dragging, it paints and repeats the steps
- Delete: By clicking, it deletes notes
- Mute: By clicking, it deactivates certain notes
- Slice: By clicking and dragging a line, it breaks notes to multiple parts
- Select: By clicking and holding, it selects a group of notes
- Zoom: By clicking, it zooms in all notes
- Playback: By clicking, it allows you to hear what notes are playing
Some advanced MIDI editing options are available on the top left. They allow switching off the snapping of notes to a precise grid (beats or bars). The tool section completely changes the available notes. The stamp section adds new chords and rhythms. Here we will not be discussing this in detail. This guide does not answer the questions related to notes and music theory.