
Prism Audio MDIO PRO Tools HDX
Form a band online, promote your music, buy custom beats, sound parts, and share your Beat or Track as a Royalty Free loop with us. Collaborate to make beats online with the best loop makers from around the world on the Forum for musicians and beat makers. Keep up to date with Music News and learn from FL Studio Video Tutorials and the articles on the Blog. Free DAW Music Software downloads, VST and Instrument Packs for FL Studio, Pro Tools, Logic, Ableton, and how to use the most popular free DAW Software, Fruity Loop Plugins, MIDIs and more.

Prism Audio MDIO PRO Tools HDX
The MDIO-PTHDX module from Prism Sound is an add-on for Prism Sound interfaces that has an MDIO slot. Using a Pro Tools /HDX PCIe card, a Pro Tools/HD Native PCIe card, or a Pro Tools /HD Native Thunderbolt interface with a DigiLink connection, several devices can be linked directly to an Avid / Pro Tools system. Pro Tools users may take advantage of the superb sound quality of the Prism Sound Atlas and Titan A/D and D/A converters, as well as the equally well-regarded on-board microphone preamplifiers, using this combination.
The Prism Sound Atlas and Titan units with Pro Tools are really simple to set up: attach up to four mixed-type Prism Sound Atlas or Titan units in a pile to individual DigiLink port, and it automatically configures itself to imitate Pro Tools/HD I/O interfaces. Four Prism Sound Atlas or Titan devices simulate two Pro Tools/HD I/O units in the maximum configuration for a single DigiLink, offering up to 32 analog input and output channels.
The Prism Sound Atlas units will automatically configure to make the best use of the maximum I/O counts supported by the HDX cards. TWO Prism Sound Atlas units (nominally named Main and Sub) normally emulate a single Pro Tools | HD I/O unit. The bottom unit in the stack is always the Main unit, and its associated Sub is immediately above the partner Main unit. It's vital that Loop sync connections should only be made between Main units (and not to include Subs in the Loop sync loop) and should use the Wordclock connectors on the Prism Sound Atlas units. With an odd number of Prism Sound Atlas units in a stack, one will behave as a "lonely" Main and emulate a single HD I/O unit to optimize the channel numbers available.
The Prism Sound Atlas devices are set up automatically to utilize the HDX cards' maximum I/O counts. Normally, two Prism Sound Atlas devices (dubbed Main and Sub) are used to imitate a single Pro Tools/HD I/O unit. The Main unit is present at the bottom of the stack, and its linked Sub is present above the Main unit. Loop sync connections must be established between Main units using the Prism Sound Atlas units' Word clock connectors. Each HD I/O unit may have 16 inputs and 16 outputs simultaneously, with a maximum of two x HD I/O units per stack in Pro Tools. Two DigiLink connections are available on a Pro Tools/HDX card, allowing two stacks to be linked to the HDX card. Up to three HDX cards and so six stacks can be used with numerous HDX cards. You may mix Prism Sound Atlas, Titan, and HD I/O in the same stack. A-Pro Tools/HD I/O unit (or any other Pro Tools compatible I/O device) cannot be linked between two Prism Sound Atlas units.
The special Loop Sync can be utilized as you connect Loop sync. Along with it, you can utilize the connectors on any Pro Tools/HD I/O device and the Wordclock connections on the Prism Sound Atlas equipment. The Prism Sound Atlas devices are meant to replicate the functioning of Pro Tools/ HD I/O units. The replication is done using the MDIO-PTHDX module, and the Pro Tools software will recognize them as HD I/O units. When the DigiLink connections are made, they look similar to the Pro Tools | HD I/O units. To operate in MDIO-PTHDX mode, no external software is needed. However, there might be a need to install the Mac or PC drivers and control panel to utilize the devices in USB / UAC2 mode. If you want to utilize the MDIO-PTHDX module, the Prism Sound Atlas must be switched to a new mode where it should work using Pro Tools operation.
In the Pro Tools program, there is a list of controls. They are,
-
The Clock Source control sets the Loop Sync Master.
-
The Clock Sources are AES/ADAT/Baseclock/Wordclockandthe Loop Sync Master will be determined by the unit selected.
-
You can identify the specified unit(s) when the LED flashes.
-
The external clock output like Baseclock, Wordclock, or TDIF, is used to choose among the available I/O.
-
An Individual +4/-10 Line Input sensitivity switching settings for each Line Input connection may be found on the Hardware Setup page's Input tabs. It's worth noting that the outputs are set to +4 by default in Pro Tools.
-
Limiter / Soft Clip allows Prism Sound Atlas's Over-killer function on separate inputs.
On the Input and Output tabs, I/O displays a matrix for remapping the I/O. The Mic Preamp tab lets you configure and adjust the Mic Pre controls' mapping. The Mic Pre controls are left behind when the Inputs are re-arranged in Hardware Setup
Mic/Line controls
-
Mic/Line/DI indication – The input type gets automatically selected. And the selection is dependent on what type of connection you feed into the Prism Sound Atlas or Titan input. As you utilize the front panel Instrument jack, the DI appears.
-
Depending on the input channel, a high-pass filter can be selected.
-
On-Line inputs, the Mic/instrument gain control is not accessible, although Phase switching is available for each input channel.
-
On Mic inputs, +48V phantom power switching is possible, as well as -20dB pad switching.
Installing MDIO Module
If you want to install the MDIO-PTHDX module, you must first remove the unit's lid and need some dexterity to do it. If you have any doubts regarding whether or not an MDIO module can be installed in a prevailing Prism Sound Atlas or Titan device, it is advisable to speak directly with the dealer, who will be able to assist you. A regular No. 1 posi-drive cross-head screwdriver and a 2mm hex head screwdriver are required, and a suitable Allen key is also provided with the MDIO kit. Additionally, you must verify the current firmware version of the Prism Sound Atlas or Titan device and, if necessary, upgrade the software.
-
Take off the unit's cover. There are six hex-head screws on each side of the Prism Sound Atlas, while the Titan has five, and both units have three more screws at the top edge towards the back. While you're installing the module, the screws should be kept safe.
-
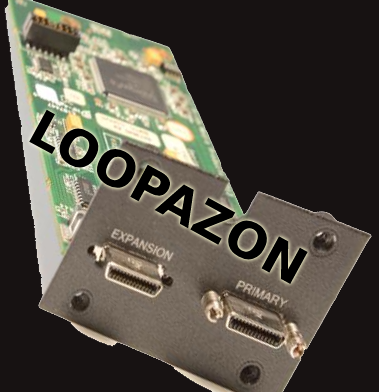
The MDIO blanking cover plate must also be removed. These plates would be secured with four hex-head screws.
-
A white multi-pin connection designated "CN19" is located about halfway back from the MDIO slot, with two cross-head screws on either side. Remove the two cross head screws by unscrewing them. In some cases, Hex spacers are already installed in place of the cross-head screws; in this instance, you can skip the next step.
-
Replace the cross head screws you just took out with these. These can be finger-tightened with a screwdriver. If you're using pliers or (the right tool) a 5mm nut-spinner, be careful not to overtighten them.
-
The MDIO-PTHDX module can be removed from its anti- fixed bag using anti-fixed safety measures.
-
Connect the MDIO-PTHDX module to the appropriate connection. Place the faceplate end against the back panel and flush with the inside of the Prism Sound Atlas/ Titan rear panel. The MDIO PCB should then be positioned such that the screws get lined up with the screw holes. It shouldn't take much force to pair the connections; once they're in the right place, the board should softly press down.
-
Then the two 6mm x M3 screws are screwed through the board and into the hex spacers after everything is in place.
-
The backplate of the MDIO-PTHDX module is fixed to the rear panel of the Prism Sound Atlas/Titan with some new hex head M3 screws. The lowest set of holes closest to the bottom of the box should be drilled using the short pair.
-
The screws are replaced, and the lid is fitted again.